Thursday, June 30, 2011

Farmers' Market Potato Salad


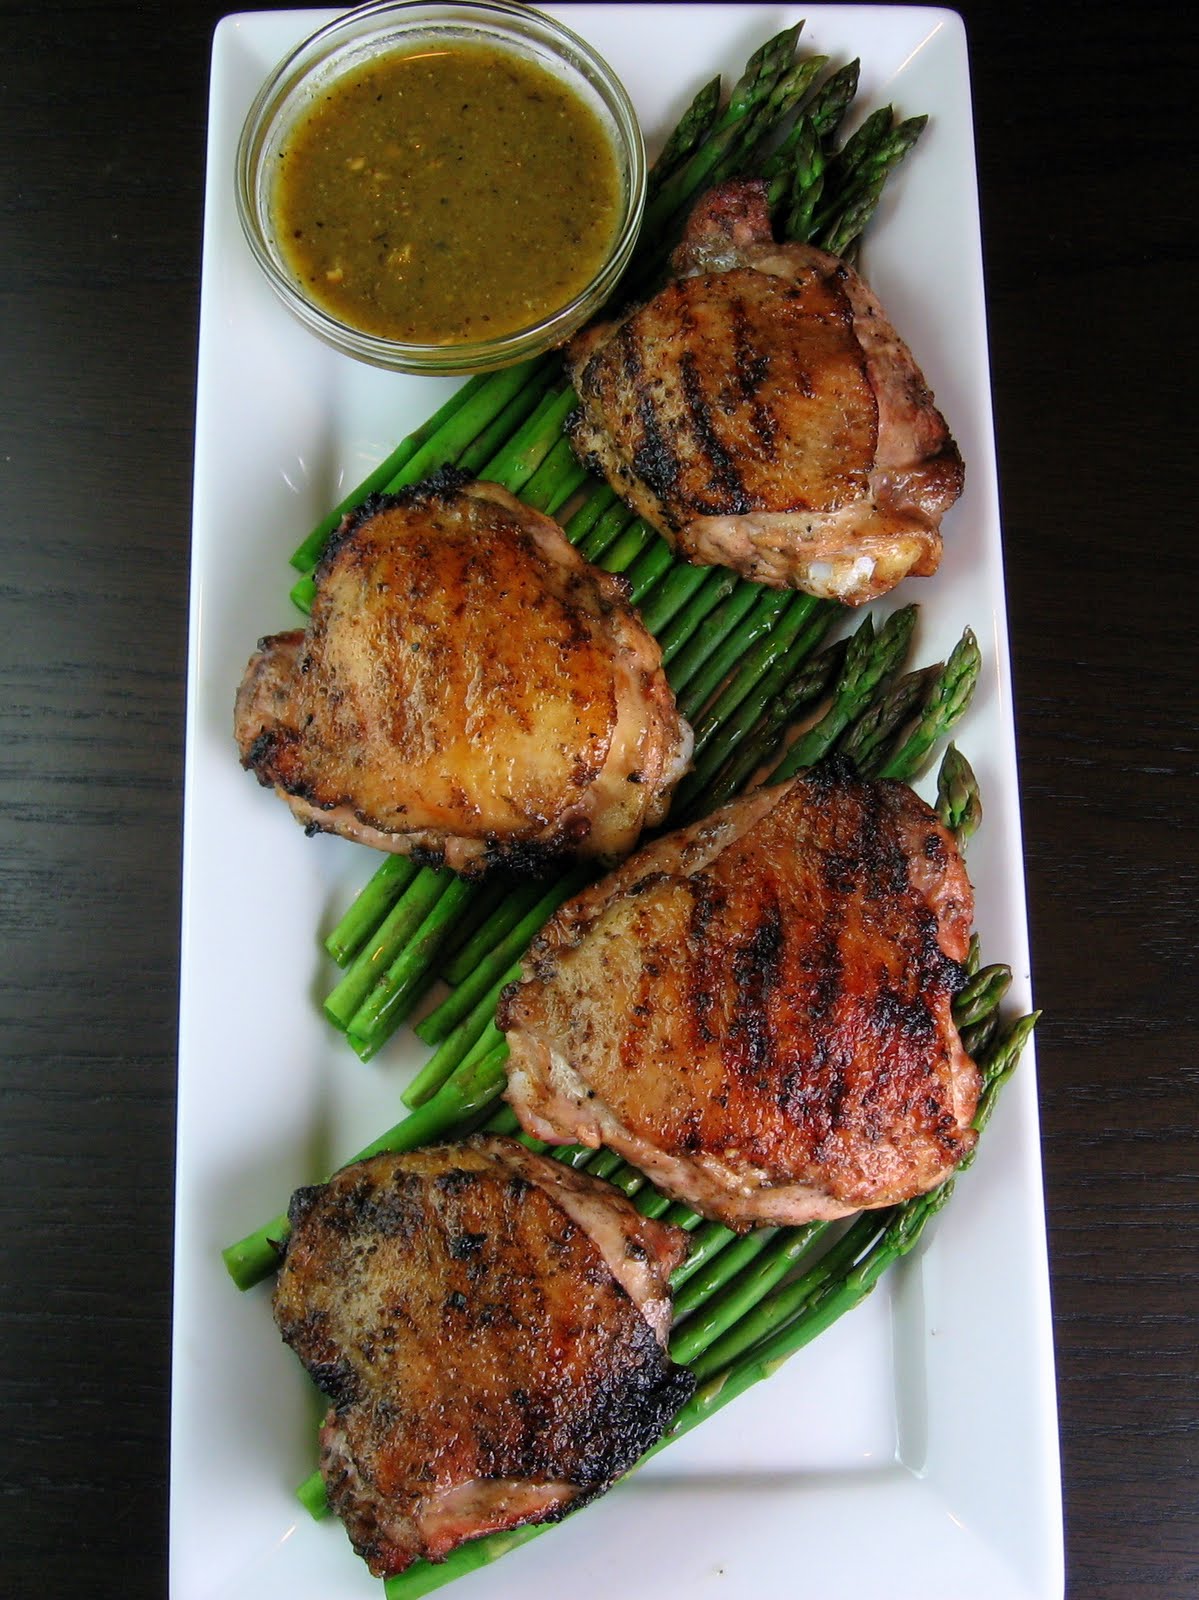
This colorful blend of seasonal vegetables is a perfect side dish to bring to a BBQ or potluck. Joe was on board immediately after I told him the dressing contained two full tablespoons of Dijon and a little Tabasco, which I hardly ever use.

It's also easy to bump it up to a main dish by adding kidney beans and serving it on a bed of leafy greens, like we did. I wasn't intending to photograph it on the plate, but I loved how it looked so I snatched it out of Joe's hands and took a few shots :-)


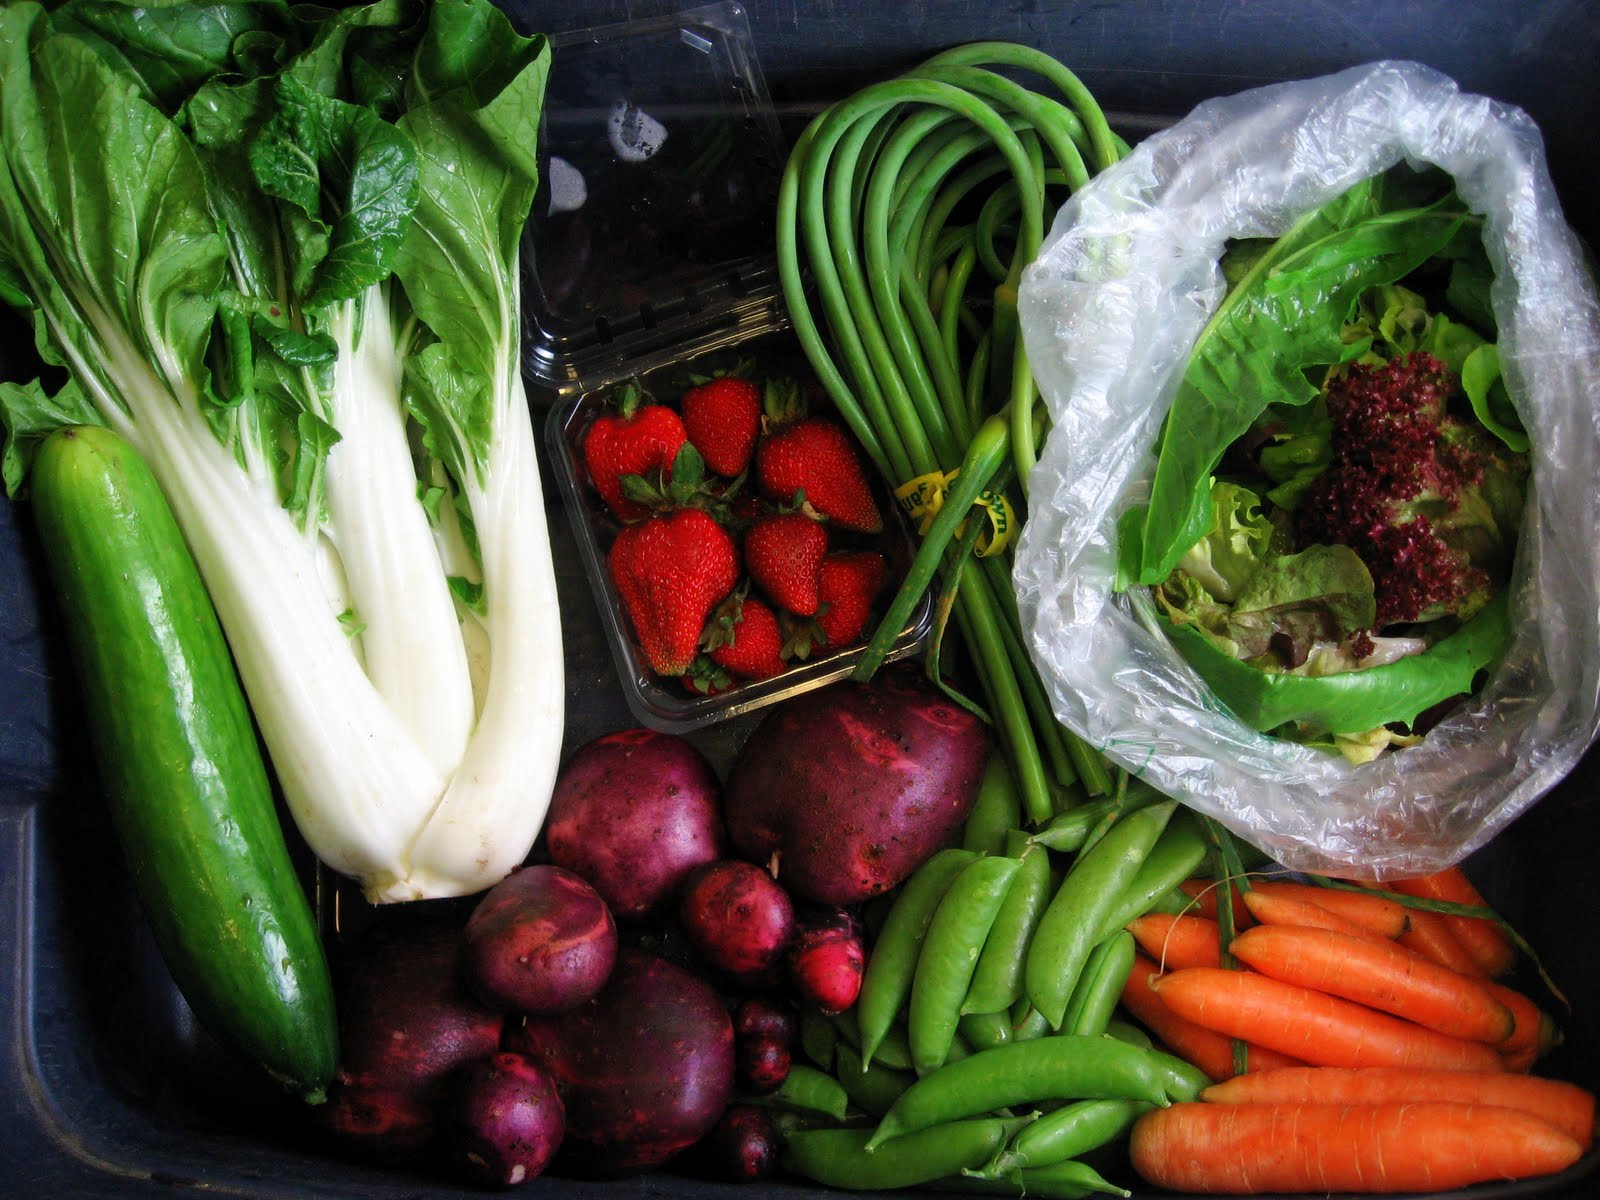
Here is my review of our CSA box, week 4:


We got: 1 head oak leaf lettuce, 1 pound Oregon Spring tomatoes, 1 cucumber, 1 red onion, 2 pounds fava beans, 2 pounds French fingerling potatoes, 1 basket cherries, 1 basket strawberries. (Note that it was a heaping basket of cherries, but we couldn't stop eating them even while I took the picture). 

We started out the week by using some of the red onion and finishing up the cabbage leftover from week 3. I found a Rachael Ray recipe for Fiery Roast Turkey Sandwiches that sounded good, so I made a version of that. It's basically just a turkey sandwich but you add a few special touches to make it really flavorful, like pickled red onions that you cook quickly on the stove with sugar and red wine vinegar, a spicy chipotle cream cheese spread, and topped with a pile of shredded cabbage and radishes. I decided to make it a wrap instead of a sandwich, and I prepared a smaller amount of the chipotle cream spread using just a few wedges of laughing cow cheese. It was good! I loved the pickled red onions. They would be yummy addition to hamburgers or veggie burgers too.

We used some of the fava beans in this lovely spring frittata with morels and Parmesan cheese by Cooking Light. It was a good meal, though honestly, the morels could have been shiitakes -or almost any other mushroom- and I wouldn't have known the difference.


The rest of the favas were used in a lemony yogurt-based salad from the CSA newsletter. It was a variation of a recipe in Deborah Madison's Vegetarian Cooking for Everyone, adapted to use the ingredients in our box that week. Anyone else have this cookbook? What do you think of it? It seems like one I would like, because this salad was really good. Also, go here if you want to see my breakdown of how to prep fava beans.

Let's see...if I remember correctly...the cucumber was sliced and eaten with hummus, the strawberries were eaten with yogurt, and the cherries were chopped and added to bowls of vanilla ice cream. We still have a couple of potatoes left for next week.

The tomatoes, most of the red onion, and most of the potatoes (some from this week, some from last week) were used for the potato salad, recipe follows.


Farmers' Market Potato Salad
adapted from Cooking Light - June 2010
serves 6 as a side dish

Notes: Stir in a can of red kidney beans (rinsed and drained) at the end to make it more of a main dish, if desired.

1 cup fresh corn kernels (or frozen, if the corn is not yet ready where you live)
2 pounds fingerling potatoes, cut into 1-inch pieces
2 1/2 tablespoons olive oil, divided
2 tablespoons chopped fresh tarragon, basil, or a combination
2 tablespoons cider vinegar
2 tablespoons whole-grain Dijon mustard
1/2 teaspoon hot pepper sauce (such as Tabasco)
3/4 teaspoon salt
1/2 teaspoon freshly ground black pepper
Cooking spray
3/4 cup vertically sliced red onion
3/4 cup diced zucchini
1 cup cherry or other tomatoes, halved or chopped if large

Preheat the oven to 425 F.

Place the corn and potatoes on a jelly-roll pan and toss with 1 tablespoon of the oil. Bake for 30 minutes, or until the potatoes are tender. The corn should be nice and roasted, but not burned. Set aside.

In a small bowl, whisk together the tarragon/basil, vinegar, mustard, hot sauce, salt, and pepper. Gradually add the remaining oil while whisking constantly to create an emulsion. Put the contents of the jelly-roll pan into a large bowl, and drizzle the dressing over the top. Toss to coat.

Heat a large skillet over medium heat and coat with cooking spray (or add a little more olive oil if you don't use cooking spray). Add onion and zucchini, cook 4 minutes or until lightly browned. Add this mixture, along with the tomatoes, to a large bowl and toss gently to combine. Taste and season with more salt and pepper if needed.

This dish can be served immediately, or you can make it ahead and refrigerate until ready to serve. It's just as good cold.

Thursday, June 23, 2011

Cabbage Rolls with Whole-Grain Bread Stuffing


We got a huge head of green cabbage in our CSA this week, so I decided to use some of it to make cabbage rolls. Usually, the filling for stuffed cabbage consists of seasoned ground meat with some grains mixed in, often served with a sauce of some kind. I chose to go a different route this time, and make a vegetarian version I found in How to Cook Everything Vegetarian. The cabbage leaves are filled with a stuffing made of whole-grain bread, dates, and dried figs. It reminded me of a stuffing you might see as part of a Thanksgiving spread. It sounded a little weird at first, but I figured, if Mark Bittman recommended it, it had to be good (he called it a bread salad, but to me it looked like a stuffing, so that's what I'll call it).

We actually really liked it! This stuffing would be great on its own too, for Thanksgiving, or just a regular old Thursday in general, for that matter. The dried fruits, sage, and toasted hazelnuts made me ache for fall. We used a really nice aged balsamic vinegar (so thick it looks like syrup as it drizzles out of the bottle) which added a ton of great flavor.

Here is our CSA box for week 3:


One bunch basil, one pound zucchini, 1 giant head cabbage, 2 pounds Nicola potatoes, 1 bunch white turnips, 1 head garlic, one sweet onion, one pint strawberries, one head red leaf lettuce.

I used some of the basil, garlic, and all of the zucchini to make my favorite stuffed zucchini recipe by Rachael Ray. It was so good, especially because I used Prosecco instead of dry white wine.

The next night, we finished off the bottle of Prosecco by braising the turnips and turnip greens. With small turnips like these they would have been fine to just be sliced raw into salads, but I prefer them cooked.

We were able to use the cabbage for so many meals, I'm still amazed just thinking about it. We started out by pulling off the largest leaves for the stuffed cabbage recipe below. Next, we made Inside-Out Spring Rolls, a favorite go-to meal for us. The next night, we sliced some of the remaining cabbage into large wedges, drizzled with olive oil, salt and pepper, and roasted it in the oven. We also chopped the sweet onion and some of the potatoes into small wedges, added some sliced chicken apple gouda sausage, tossed in oil, salt and pepper, and roasted that as well. It made for a delicious meal.

After all that, we still have a hunk of cabbage left in the fridge for next week.

We also have a couple of potatoes leftover that as of writing this we haven't used yet. This particular variety of potato is very low on the glycemic index, which means it won't make your blood sugar spike like regular potatoes do, so that's nice if you have to watch your blood sugar.

And as usual, the lettuce went into simple salads, the strawberries onto yogurt and breakfast cereal.


Cabbage Rolls with Whole-Grain Bread Stuffing 
adapted from Mark Bittman - How to Cook Everything Vegetarian
makes 8-12 rolls, about 4 servings

Note: Technically, the recipe for the bread stuffing contains 8 ounces of kale that has been cooked, squeezed dry, and chopped. I omitted it because 1) I didn't have any, 2) I didn't want to buy any, and 3) I was already wrapping the stuffing in cabbage so I figured I was all set for green vegetables. But go ahead and add it if you want.

For the stuffing:
8 ounces whole grain bread (stale is fine), preferably thickly sliced (I used Dave's Killer Bread, because that's what I had)
1/4 cup extra virgin olive oil
2 tablespoons balsamic vinegar
1/2 cup chopped dried figs (10-12, depending on the type)
1/4 cup chopped pitted dates (about 4)
1 shallot, minced
1 tablespoon minced fresh sage, or 1 teaspoon dried
Salt and freshly ground black pepper
1/4 cup chopped toasted hazelnuts

1 medium head white or Savoy cabbage

Preheat the oven to 400 F. Lay the slices of bread on a baking sheet and toast in the oven, turning a couple of times, until the bread is dried out and golden brown, about 10 to 20 minutes, depending on the thickness of the bread. Remove from oven and let cool.

Meanwhile, combine the oil, vinegar, figs, dates, shallot, and sage in a large bowl. Season with salt and pepper.

Fill a large bowl with water. Soak the slices of bread for a couple of minutes, then gently squeeze each slice, wringing it out like a cloth, to remove as much excess water as possible. Using your fingers, crumble each slice into the bowl with the other stuffing ingredients. Repeat with remaining slices. Toss to combine. Let sit for at least 20 minutes or up to an hour, stirring occasionally. Stir in the hazelnuts. Taste and adjust the seasoning as needed.

To prepare the cabbage, use a thin-bladed sharp knife to cut a circle around the core on the bottom of the cabbage. (Bittman suggested cutting out a cone shape to remove the core completely, but I had trouble doing that. The main thing you want to achieve here is cutting away the bottom leaves from the core to make it easier to peel off each leaf without tearing them.

Pull off 8-12 large, untorn leaves from the cabbage. Put these leaves in a steamer basket above a couple inches of salted water. Cover and cook until the leaves just become flexible enough to bend. I had to do this in batches because I have a small steamer basket.


Remove the leaves from the steamer, and let cool for a minute or two, until cool enough to handle. Cut a 'V' in each leaf to remove the tough central stem.

To stuff the leaves, lay a leaf curved side up (the outer side of the leave is facing you) on a counter or cutting board. Place about 1/4 cup of the filling (or more, if the leaves are very large) in the center of the leaf, near the cut-out part of the stem. Fold in the sides, then roll up from the stem end, like you're rolling up a little burrito. Do not roll them too tightly because the mixture will expand as it cooks.

At this point you can cover and refrigerate the cabbage rolls for a day or two. Let them come back up to room temperature before proceeding.

Lay the cabbage rolls seam side down in the steamer basket, cover and cook for 10-15 minutes, or until the cabbage is tender. Serve immediately.

Monday, June 20, 2011

Italian Braised Short Ribs in Red Wine


I love using my slow-cooker. Especially when I find a recipe with an exceptionally long cooking time such as this one. During the week I'm away from home for about 9 1/2 hours a day, and lately I've also been doing TurboFire after work in my garage "gym" which adds another hour (I try to workout in the mornings but lately I've been lacking the motivation to get up that early). So an ideal slow-cooker recipe for me is one that can go at least 10 hours, if not more. Ding Ding Ding - we have a winner with this one! On low it goes 10-12 hours. Perfect! And it calls for two cups of wine, which uses enough of the bottle to justify finishing off the rest yourself :-)

I realize that it's now grilling season, but I made this recipe a month ago when it was still cold and wet, at least where I live, and even though I'm way behind I still really wanted to blog about it.

I really like this cookbook (it was a bridal shower gift) - it's by the makers of Crock-Pot and it features more "gourmet" recipes than other slow-cooker books I've seen. Each recipe has a full page photo. I've also made their recipe for maple whiskey glazed beef brisket which was excellent. It has a lot of breakfast/brunch type recipes that I want to try someday as well.


Italian Braised Short Ribs in Red Wine
adapted from Crock-Pot Gourmet Slow Cooking Recipes
serves 4-6

Note: For this recipe, the package of short ribs we had in the freezer ended up only being about two pounds, instead of the three that the recipe called for. We went ahead with it anyway, still using the full amount of all the other ingredients. While we only had enough meat for about three servings, there was still plenty of delicious broth, onions and mushrooms leftover, so we added some cooked wild rice and turned it into a soup for a second meal later in the week. 

3 pounds beef short ribs, trimmed of excess fat
Salt and freshly ground black pepper
1 tablespoon vegetable oil, plus more if needed
2 large onions, sliced
2 cloves garlic, minced
1 pound baby bella or cremini mushrooms, cleaned and quartered
2 cups red wine
2 cups beef broth
2 teaspoons Italian seasoning

Spray the inside of a 5 1/2 quart slow-cooker with cooking spray. Season the short ribs with a little salt and pepper. Heat a large skillet over medium-high heat. Working in batches, add the ribs and brown on all sides, adding additional oil as needed. Transfer ribs to slow-cooker as they finish browning.

To the same skillet you were just using, add the onions. Cook, stirring often, for about 3-5 minutes, until the onions are translucent. Add the garlic, mushrooms, wine,  broth, and Italian seasoning. Stir to combine. Bring the mixture to a simmer and cook for about 3 minutes. Pour this mixture over the short ribs in the slow-cooker. Cover and cook on low for 10-12 hours or on high for 6-8 hours, or until beef is tender. Taste and season with salt and pepper as needed.

Transfer ribs, mushrooms and onions to a serving plate. Strain the remaining liquid to get a smooth sauce. Serve with mashed potatoes or polenta and drizzle the whole meal with the strained sauce.

Friday, June 17, 2011

Carrot Macaroni and Cheese


Would you believe this dish contains almost a full pound of carrots??

I've made macaroni and cheese with squash before, but never with carrots, so this was definitely a first for me. Whenever I swap out cheese for vegetables in these kind of makeover mac and cheese dishes, it's best for me to think of it as a standalone baked pasta dish, because it will never compare to the classic ooey-gooey mac and cheese that will always hold a special place in my heart. When you aren't trying to think of it as a substitute for the real thing, you are free to enjoy the dish for what it is, which in this case, is bright in both flavor and color, creamy, and delicious. I loved the combination of orange, tarragon and carrots. As I was making the sauce I was struck by how vivid the color was - it reminded me of the orange powdered cheese sauce you get with boxed mac and cheese, except there was nothing artificial about this color.


Before I go into the recipe, let me quickly recap week 2 of our CSA. Here is what we got this week:


One cucumber, one bok choy, two pounds purple viking potatoes, a pint strawberries, 3/4 pound sugar snap peas, one bunch garlic tops, one pound carrots, 1/2 pound salad mix.

The garlic tops, sometimes called garlic scapes, were probably our favorite item in the box this week. They have a mild garlic flavor and can be treated as tender spring veggies like green beans or asparagus. Our CSA newsletter said they would be great steamed and then dipped in hummus. So along those lines I decided to make a baked white bean dip recipe that I discovered over at Pinch My Salt. We loved eating this dip with cucumber slices, steamed garlic tops (cut into 2-3 inch pieces), snap peas, and pita chips.

A few nights later we made a yummy stir fry with the rest of the garlic tops and snap peas. We added some shrimp, some jarred black bean and garlic sauce, and served everything over white rice. Black bean sauce is awesome!

For the bok choy we simply sliced it into thin strips and sauteed it in a little olive oil, and actually if I remember correctly, we made hot dogs to go with it, because we're just so fancy like that.

We devoured the red ripe strawberries right out of the package, and made salads for lunches with the salad mix.

The purple viking potatoes are brilliantly purple on the outside, white on the inside, and can be used just like red potatoes. So we used half of them to make this awesome potato salad by Mark Bittman with shallots, capers, and whole grain mustard and served it alongside some of our Bald Hill T-bone steaks. The rest of the potatoes and some leftover steak (the T-bones were huge!) were used to make our favorite hash which was perfect for a lazy weekend breakfast.

The carrots, obviously, were reserved for this mac and cheese.


Carrot Macaroni and Cheese
adapted from the Food and Wine website
serves 4

3/4 pound carrots, peeled and thinly sliced
Zest and juice of one naval orange, zest removed in long strips with a vegetable peeler (you'll fish them out at the end, so you want them to be in big enough pieces that you'll be able to find them)
Salt
3 cups uncooked penne (9 ounces)
1 1/2 cups sharp cheddar cheese, shredded (3 ounces)
1 tablespoon chopped tarragon
Freshly ground white pepper (I forgot to use white pepper and instead just used regular black pepper out of habit; it was fine)

Preheat the oven to 350 F.

Combine the carrots, zest, juice, 1/4 cup of water, and a little bit of salt in a medium saucepan. Bring to a boil, then reduce the heat, cover, and simmer for about 30 minutes, or until the carrots are very tender. Discard the zest. Transfer the remaining contents of the saucepan to a blender or food processor and puree until very smooth.

Meanwhile, bring a large pot of salted water to a boil and add the penne. Cook until al dente. Drain, reserving 1 cup of the pasta water.

Return the pasta to the pot. Add the carrot puree and the reserved pasta water. Cook over medium-low heat, stirring gently. After about 5 minutes of cooking, the sauce should have thickened a bit and should coat the pasta. Stir in about 3/4 of the cheese and stir as it melts, another 2-3 minutes. Stir in the tarragon and season with salt and pepper to taste.

Pour the mixture into a 9x9 baking dish and top with the rest of the cheese. Bake for about 20-25 minutes, until the cheese is melted and lightly browned. Let stand 5 minutes before serving.

Tuesday, June 14, 2011

Homemade Granola


We have been on a granola kick for about 6 months now, and buying it at the store was getting really expensive! When we had the time to drive out to Costco we'd pick up a big box for a pretty decent price, but if we didn't have time to make the trip we'd have to buy it at the regular grocery store which, even from the bulk section, is not a good value at all, especially when I insist on buying a high quality kind without fillers or refined sugars.

So this was my first attempt at making it from scratch. Turns out, it's a piece of cake! Seriously, it takes about half an hour, and it makes enough to last us about two weeks. I used a recipe from America's Test Kitchen, making just a couple of changes based on my personal preferences. There is a lot of wiggle room with granola though. Basically you are just mixing together oats, nuts, seeds, and dried fruits to your liking, adding some sweeteners, and baking in the oven until toasty and crisp.

One thing I changed from the original recipe was to grind up some of the oats before mixing them in with the rest of the ingredients. My friend at work said this helps make the granola chunkier, so I tried it with the second batch I made. I did notice that it was a little chunkier, which I liked, so I'm going to continue to do that with future batches.

I've estimated that two tablespoons of this granola is about 2 WW Points+. It's helpful for me to think of it more as a condiment. I like to sprinkle it over my morning bowl of Cheerios or plain yogurt to add some flavor and healthy fats.

What ingredients do you like in your granola? What's your favorite way to eat it?


Classic Granola
adapted from America's Test Kitchen Family Cookbook
makes about 7 cups

Notes: Since this granola has a shorter shelf life than a store-bought product, it only lasts about a week stored in an airtight container at room temperature. It does freeze well, however, so I store half of my batch in the freezer in a sturdy ziplock bag and just take it out and let it thaw on the counter once we've finished the first half.

3 cups rolled oats
1 cup chopped walnuts
1/2 cup unsweetened shredded coconut
1/2 cup chopped almonds
1/4 cup flax seeds
1/4 cup sunflower seeds
1/3 cup vegetable oil
1/4 cup maple syrup
1/4 cup honey
1 cup dried cranberries or raisins

Make sure you have an oven rack adjusted to the middle position and preheat the oven to 325 F.

Measure out 1/2 cup of the oats and grind them in a small coffee grinder or food processor. Add them to a large bowl along with the remaining rolled oats, walnuts, coconut, almonds, flax seeds, and sunflower seeds. Toss the ingredients together to combine.

To a small saucepan add the oil, maple syrup, and honey. Warm this mixture over low heat for a few minutes, then add to the large bowl of dry ingredients and toss to coat.

Spread the granola in an even layer over a large rimmed baking sheet. Bake for 15-20 minutes, stirring every 5 minutes, until the mixture has turned a light golden brown. Remove from the oven and stir in the cranberries or raisins. Let the granola cool to room temperature. It will continue to crisp up during this time. Loosen the granola with a spatula. Store in an airtight container for up to one week (see note above regarding freezing).

Thursday, June 9, 2011

Lavender Fettuccine with Shredded Vegetables


This meal was made with vegetables from our first CSA of the season! Two years ago we tried a 3/4 box for the first time and became hooked. Last year we split a full CSA with my friend Amy and her family. This year we are doing a full box - just the two of us. I foresee lots of meal planning in my future to ensure that nothing goes to waste, but I think we're up to the challenge.

This is our CSA box from week one:


We got one head of red leaf lettuce, one bulb of fresh garlic, one white sweet onion, one red onion, one pint of strawberries, one bunch of basil, 1/2 pound of zucchini, 2 pounds of red potatoes, and one bunch of carrots.

For the most part, we made very simple meals with all this produce. We ate some of the strawberries for dessert and again the next day with breakfast, just plain. We made salads for our lunches all week with the lettuce and basil (topped with wild rice salad to make it filling). We roasted the garlic and some of the potatoes in the oven with just oil, salt and pepper. One night we had a craving out of nowhere for chili dogs so we used some of the red onion for a topping and had carrot sticks on the side. We had a few friends over for an impromptu BBQ on Friday and grilled the sweet onion to put on the burgers.When I had more time on Sunday I used the rest of the red potatoes to make an amazing blue cheese and red potato tart (recipe courtesy of Smitten Kitchen).

The zucchini and the rest of the carrots were put to good use in this pasta dish. On a whim, I bought a package of lavender fettuccine from a company called Pappardelle's. They had a booth at the LA farmer's market when I was there in May. It turns out they sell their pasta at many other farmer's markets, including my hometown of Vancouver, WA and nearby Battle Ground, so my parents can swing buy and pick some up for me when I want more. I still can't believe Battle Ground, WA has grown large enough that it can justify having it's own farmer's market. Craziness!

Anyway, back to the food. I based my version of this dish off of a Mark Bittman recipe (here's a video I found of him cooking it). He actually infuses real lavender into sauteed shredded veggies and tosses it with plain bow-tie pasta. Since my pasta was already flavored, I didn't need to add fresh lavender. I did want just one sprig to use as a garnish, but alas, I could not find any after visiting three different grocery stores. I ended up using a little rosemary from my backyard.

Shredding the vegetables in the food processor made this meal quick and easy, but I think it would also be fun to use a vegetable peeler and slice them into long ribbons. Maybe next time I'll try that. Or you can try that and tell me about it.

I loved, loved this pasta. I loved the pleasant aroma while it was boiling, and the taste was delicate and subtle - you could tell it was lavender but it didn't hit you so hard you felt like you were ingesting soap.


Lavender Fettuccine with Shredded Vegetables
adapted from Mark Bittman Minimalist column in the NYTimes - August 2008
serves 3-4

Notes: You could use any long cut pasta for this recipe. It would also be good with farfalle (bow-tie) or penne. If you aren't starting with lavender pasta, you'll need a few lavender leaves and/or flowers. Add some of it when you start to saute the vegetables, then a little more, to taste, once you toss the pasta together with the vegetables at the end.

8 ounces lavender fettuccine
2 small zucchini, trimmed
2 small carrots, peeled and trimmed
1 small red bell pepper, cored
3-4 tablespoons extra virgin olive oil
2-3 cloves crushed garlic
salt and freshly ground black pepper to taste

Bring a large pot of water to a boil and salt it.

Meanwhile, shred the vegetables in a food processor or just use a grater. Add the oil to a large skillet over medium-high heat. Add the garlic and let it cook for a few minutes, until it starts to brown. Add the vegetables and sprinkle with salt and pepper. Cook for about 5 minutes, stirring occasionally, until they start to soften.

Once the water is boiling, add the pasta. Cook until it is just barely tender, using the cooking time on the package as a guide (you don't want to cook it all the way because it will continue to cook when you add it to the vegetables in the hot skillet later on). Drain, reserving some of the cooking water.  Add the pasta to the vegetables, stirring gently to combine. Continue to cook for a few more minutes, adding the pasta water as needed to keep the mixture moist.

When the pasta and vegetables are tender but not mushy, it's done! Taste and season with salt and pepper as needed.

Wednesday, June 8, 2011

Grilled Chicken with Tangy Yucatecan Spices, Roasted Fresh Chile Salsa, and Asparagus


We've had some great weather lately, so we've been doing a lot of grilling. Joe was craving a Rick Bayless recipe, so he chose this one. At it's core, it's just grilled chicken and vegetables, except it becomes special because of the spicy garlic marinade you make for the chicken, and the use of seasonal vegetables which have the most flavor and nutrients.

The marinade reminded me of jerk spices. It had lots of garlic, along with sweet flavors from cloves and Mexican canela, which is a lot like regular cinnamon. You could just use cinnamon, but as we found out, you can get ground canela for like $1 at a well-stocked grocery store, so why not pick some up?

We also made a fresh salsa to go along with it. Joe really liked it, but it was way too spicy for me; I preferred the chicken just by itself. I might have liked the salsa better if I'd seeded the peppers, since I'm kind of a wuss like that.

We chose to use bone-in chicken thighs because humanely-raised, vegetarian-fed chicken was not on sale that week and thighs are one of the cheapest cuts. Boneless chicken breasts or thighs will work too but they will not have as much flavor as bone-in.

For the vegetable, you could use whatever is in season at the time. In the winter, try sliced potatoes (red-skinned or Yukon Gold) or beets. In the fall, use sliced zucchini or other summer squash. In the summer, sliced tomatoes would be excellent. Since it still feels like spring around here, I went with asparagus.


I've read that the best way to store asparagus is upright in a container with a bit of water, as if they were cut flowers. So I searched my kitchen and found what I think is the perfect vessel for a bunch of asparagus, though I am aware that it's probably a travesty to use an Okoberfest mug for anything but beer.


Grilled chicken with Tangy Yucatecan Spices, Roasted Fresh Chile Salsa, and Asparagus
adapted from Rick Bayless - Mexican Everyday
serves 4

For the Yucatecan Garlic-Spice Marinade
1 head garlic, broken into individual cloves (you want about 12 cloves)
1/3 cup vegetable or olive oil
6 tablespoons apple cider vinegar
pinch ground cloves
1/2 teaspoon ground black pepper
1/2 teaspoon ground cinnamon, preferably Mexican canela
1 teaspoon dried oregano, preferably Mexican
1/2 teaspoon sugar
Salt, to taste

4 chicken breast halves or 8 thighs (about 2 pounds total), skin and bones intact
1 cup chicken broth

1 pound asparagus, thick lower stems trimmed and peeled (or cut off)

About 1/2 cup Roasted Fresh Chile Salsa, for serving (recipe follows)

Cut a small slit in the side of each garlic clove, and place them all into a microwave-safe bowl. Cover with plastic wrap and microwave on high for 30 seconds. When cool enough to handle, slip off the papery husks. Put them into a running food processor one at a time, letting each one get fully chopped before adding the next. Stop the food processor, and add the remaining marinade ingredients, along with 1/2 teaspoon salt. Process until smooth.

Scrape half the marinade into a medium bowl, and the other half into a small saucepan. To the saucepan, add the broth and 1/4 teaspoon salt (or more, depending on how salty the broth is to begin with). To the bowl, add the chicken pieces and toss to coat evenly with the marinade.

Get your grill ready. If using a gas grill, heat one side to medium. Or light a charcoal fire and let it burn until the charcoal is covered with white ash and about medium-hot, then move the coals to one side.

Lay the chicken pieces skin side down on the grill over the medium-hot fire. Cook for 5-6 minutes, until nice and brown. Flip them over with tongs, moving them to the cooler side of the grill. Cook until completely tender (the juices will run clear when the meat is pierced with a fork), about 10 more minutes, maybe longer if the pieces are very large.

Meanwhile, get the asparagus ready. Put the stalks into a microwave-safe bowl with about a tablespoon of water. Cover with plastic wrap, poking a few holes in the top. Microwave on high for about 4 minutes, or until the stalks are crisp-tender. Drain the water and season with salt.

Return to the broth mixture in the saucepan, and bring to a boil. Taste and season with salt if necessary. Arrange the chicken and asparagus on a platter or individual plates, and drizzle with the sauce. Pass the salsa at the table (see recipe below).


Roasted Fresh Chile Salsa
adapted from Rick Bayless - Mexican Everyday
makes about 1/2 cup

Notes: We used jalepenos, but you can use any small hot chiles. You want about 4 ounces of chiles total.

4 medium jalepenos
4 garlic cloves, peeled
2 tablespoons fresh lime juice
Salt

Turn on the broiler and adjust the rack to the highest level. Break the stems off the peppers, cut in half lengthwise (you can seed them at this point if you want your salsa less spicy) and place them cut side down on a small baking sheet. Scatter the garlic cloves around the peppers.

Broil the peppers and garlic cloves until the peppers are soft and getting black in places. This should take a couple of minutes.

Scrape the contents of the baking sheet into a food processor or blender. Add the lime juice, plus 1/4 cup of water. Process until very smooth.

Pour into a small dish and thin with additional water if necessary. You want it to be "easily spoonable". Taste cautiously and season with salt as needed.

This salsa will keep refrigerated for about 5 days.

Friday, June 3, 2011

Chickpea-Ricotta Gnocchi


These were fun to make.

I had some ricotta cheese hanging out in the fridge that wanted to be consumed, and after searching the index of How to Cook Everything Vegetarian, I came across this strange recipe for gnocchi made out of chickpeas and ricotta.


I've never made regular gnocchi before, and probably only eaten them once or twice in my lifetime, so we aren't even really sure we cooked them properly, but when it comes to our home cooked meals, we're pretty easy to please. No matter how they turned out, we planned to top them with Bittman's fast tomato sauce spiced with red curry paste, so you can't really go wrong there.

I thought the plate needed more color so I surrounded the meal with peas. Why not?


Chickpea-Ricotta Gnocchi
adapted from Mark Bittman - How to Cook Everything Vegetarian
serves 4

Salt
3 cups cooked or canned chickpeas, drained until as dry as possible.
Freshly ground black pepper
1/2 cup ricotta cheese
1/2 teaspoon freshly grated nutmeg
About 1/2 cup all-purpose flour

Fill a large pot with water and bring it to a boil.

Meanwhile, put the dry chickpeas and a little salt and pepper into a food processor (he also suggests using a food mill, but I don't have one). Process until the mixture is very smooth. You will have about 2 cups.

Using a fork, stir in the cheese and nutmeg. Add 1/4 cup of flour and stir to combine. Add more flour as needed until the mixture forms a dough that you can handle, just barely. Knead for about one minute on a lightly floured surface. Pinch off a small piece of dough, roll it into a dumpling shape, and drop it into the boiling water. This is a test to make sure the dough holds its shape. If it falls apart, the dough needs more flour.

Gently roll/press the dough into a long rope about 1/2-inch thick, then cut into 1-inch pieces. Lightly press each piece with the tines of a fork if you want to be fancy. Try to handle the pieces as little as possible. You can lay them out on a tray lined with wax paper as you make them, spread out so they don't touch each other.

Add the gnocchi, a few at a time, to the boiling water and stir gently. Once they rise to the surface, wait about 20 seconds, then remove with a slotted spoon. Taste one, it should taste like a dumpling. I'm new at this, so that's about as specific as I can get. We thought they tasted fine.

You can put your finished gnocchi in a pan with melted butter, or a bowl with a little bit of warm sauce, while you wait for the rest to finish cooking. Serve as soon as possible, these do not keep well.

Fast Tomato Sauce with Red Curry Paste
adapted from Mark Bittman - How to Cook Everything Vegetarian
serves 4

3 tablespoons extra virgin olive oil or butter
1 medium onion, chopped
One 24- to 32-ounce can tomatoes, drained and chopped
Salt and freshly ground black pepper
1/2 to 1 teaspoon red curry paste, or more if you want it really spicy!

Add the oil or butter to a large skillet over medium-high heat. When hot, add the onion. Cook, stirring occasionally, for about 2-3 minutes or until softened. Add the tomatoes, a little salt and pepper, and the red curry paste.

Cook for about 10-15 minutes, stirring occasionally, making sure to mix in the paste. The tomatoes will break up and the mixture will thicken. Taste and adjust the seasoning. Serve with the chickpea-ricotta gnocchi.
Related Posts Plugin for WordPress, Blogger...