Showing posts with label Fish/Seafood. Show all posts

Thursday, January 19, 2012

Salmon and Leek Pot Pie


While parts of Washington are getting all kinds of crazy amounts of snow this week, down here in the Willamette valley it's raining cats and dogs. Areas of my town have flooded; people are evacuating out of their homes, and some of the farms where I buy my produce and eggs are completely submerged. It's times like these where I am actually thankful that I live on a big ass hill. Whether you are holed up in your house because of rain or snow, make this salmon and leek pot pie to chase away your winter blues.

You know who else likes salmon? This fuzzy one:


Salmon and Leek Pot Pie
adapted from The America's Test Kitchen Family Cookbook
serves 4

Notes: The original recipe makes 6-8 servings, but since I only had one pound of salmon in the freezer and didn't want to buy more, I halved it. You'll still have to bake a whole sheet of puff pastry regardless, but this way you'll have lots of extra to nibble on. This recipe calls for dill, which if you know me at all, you know that I think dill is pretty much the worst thing ever, so needless to say, I left it out. The cookbook seems to think it's pretty important in this dish though, so if you like it, use it.

For the topping:
Flour for the counter
1 (9 1/2- by 9-inch) sheet frozen puff pastry, thawed (heads up, this takes about 40 minutes!)
1 large egg, lightly beaten

For the filling:
1 pound salmon fillets, skin removed
Salt and pepper
3 tablespoons unsalted butter
1 large or two small leeks, white and light green parts only, halved lengthwise and sliced 1/4-inch thick
1 garlic clove, minced
3 1/2 tablespoons all-purpose flour
1 (8-ounce) bottle clam juice
1 cup whole milk
1/2 cup frozen peas
2 tablespoons minced fresh dill (Optional. If you do use it, don't sub dried)
1 tablespoon fresh lemon juice
Pinch nutmeg (freshly ground if you have it)
Pinch cayenne pepper
Extra lemon wedges for serving

Get all your ingredients prepped while the puff pastry is thawing.

Preheat the oven to 425 F, and adjust the oven rack to the lowest position. Lightly dust a clean counter top with some flour and gently unfold the sheet of puff pastry. Using a pizza cutter, cut along the two seams so that you have 3 pieces. Then cut each of those crosswise into four pieces, so you have 12 total. You could also get fancy and use different shaped cookie cutters if you wanted. Brush the pastry with the egg, then transfer to a baking sheet lined with parchment paper. Bake for about 8 minutes, or until the pastry is puffed and lightly browned (don't worry if it doesn't look done; you will put it back in the oven later). Set aside to cool on the baking sheet until needed.

Reduce the oven temperature to 400 F (at this time I also moved the oven rack up to the middle position, because I was afraid of baking the pot pies that close to the heating element, even though the recipe didn't say to move it up).

Remove any pin bones from salmon and cut into 1/2-inch pieces. Season with salt and pepper. Now decide whether you want to make your pot pies in individual ramekins or a 9x9 (or 9x13 if doubling the recipe) baking dish. I chose ramekins. Divide the salmon among the ramekins or spread out in the bottom of the baking dish and set aside.

Add the butter to a large Dutch oven and heat over medium. When the butter is melted, add the leeks and 1/4 teaspoon salt. Cook for about 5 minutes, or until softened. Stir in the garlic and cook until fragrant, just about 15 seconds. Next, stir in the flour and stir to coat the vegetables. Slowly whisk in the clam juice and milk until smooth. Bring to a simmer and cook for a couple of minutes until the sauce has thickened.

Off heat, add the peas, dill (if using), lemon juice, nutmeg, and cayenne. Taste and season with salt and pepper as needed. Pour the mixture over the salmon in the baking dish or ramekins. Use a spoon to redistribute the salmon evenly throughout the dish.

Arrange the puff pastry rectangles over the casserole, or place one on top of each ramekin. Bake for about 13-15 minutes, or until the sauce is bubbly and the salmon is fully cooked (place ramekins on a baking sheet before placing into the oven). Let sit for about 5 minutes before serving with the lemon wedges (enough time for a photo!).

Leftovers: We made four ramekins' worth of this meal, only ate two that night, and covered the other two with foil and stored in the fridge. The next night, we heated them up right in the ramekins in the microwave, using the "soup" setting. The puff pastry was obviously not as crisp the second day, but other than that it was delicious.

Make ahead: The topping can made up through that first 8 minute baking step up to one day in advance. Wrap them in plastic wrap and store at room temperature until ready to use. The sauce can be made up to a day in advance, just don't add the "off heat" ingredients. Transfer the sauce to a covered container and refrigerate. When ready to assemble and bake the casserole, transfer the sauce back to a saucepan and bring to a simmer, then proceed with the recipe. 

Sunday, January 8, 2012

Manhattan Clam Chowder


I love a bowl of creamy New England clam chowder just as much as the next gal, but not this month. For me, January is always about cutting back, trying to make up for the onslaught of unnecessary fat and sugar consumption otherwise known as December. The healthier tomato-based version of this classic chowder seemed like the perfect remedy.

This year was better (eating-wise) than most, on account of a nasty case of bronchitis that showed up at my door in the last few days before Christmas.

Why is that a good thing, you ask? I had planned to do all my holiday baking that week, and since no one wants a plate of cookies from someone who's coughing constantly and sounds like a 70-year-old smoker, I didn't bake a thing. Well, except for one batch of Leanne's Sugar-Free Coconut Almond Bark, but I made it right before I got sick, and I ended up eating most of it myself (I was sick, don't judge me). But at least the one thing I did make was full of healthy fats and contained no added sugar!

This chowder recipe is from a cookbook based on a popular restaurant called Mother's Bistro and Bar in Portland, OR. I went there once for breakfast (we waited outside for an hour to get a table!) and loved it. It's delicious comfort food made from scratch; you can't beat that.

Besides wanting something healthy, the other reason I decided to make this soup because I had a can of baby clams in my pantry that was set to expire soon and I didn't want to waste it. I love the little kick from the Tabasco. Don't be turned off by the long ingredient list - just think of all the veggies you'll be eating! From experience I can say that this soup freezes very well.


Manhattan Clam Chowder
adapted from Mother's Best, by Lisa Schroeder
serves 7-8

2 strips bacon, finely diced (1/4 cup)
2 tablespoons vegetable oil
1 large yellow onion, finely diced (1 1/2 cups)
1 large carrot, peeled and finely diced (3/4 cup)
2 ribs celery, finely diced (1/2 cup)
1 leek, white part only, thinly sliced into half moons and washed (1/2 cup)
1 medium green bell pepper, stemmed, seeded, and finely diced (about 1 cup)
1 clove garlic, minced (1 teaspoon)
1 (14.5 ounce) can diced tomatoes, with juice
1 (10.75 ounce) can tomato puree
1 bay leaf
1/2 teaspoon chopped fresh thyme
1 pound russet potatoes, peeled and cut into 1/2-inch dice (3 cups)
3 1/2 cups fish stock or 2 (14 ounce) cans clam juice
2 (10 ounce) cans baby clams in juice
1 1/2 teaspoons kosher salt
1 teaspoon freshly ground black pepper
5 dashes Tabasco sauce, or to taste
3 dashes Worcestershire sauce, or to taste

Set a large heavy soup pot or dutch oven over high heat. When hot, add the bacon. Cook over high heat until it starts to brown , then lower the heat to medium and continue to cook until most of the fat has rendered and the bacon is just about crisp, about 4 minutes.

To this, add the vegetable oil, onions, carrots, celery, leeks, and bell peppers. Saute for about 10-15 minutes, stirring every so often, until the vegetables are very soft. Add the garlic and saute for another 2 minutes.

Next, add the diced and pureed tomatoes, bay leaf, thyme, potatoes, and the stock or clam juice to the pot and mix well. Bring to a boil, then lower the heat and simmer for 30 minutes, stirring occasionally, until the potatoes are fork tender.

Add the clams with their juice, the Tabasco, and Worcestershire. Taste and season with salt and pepper. Bring back to a simmer for several minutes until heated through.

Ladle the chowder into bowls and serve with crusty bread or crackers. Oyster crackers are ideal, if you have them. 

Thursday, October 13, 2011

Julia Child's Provencal Tomato Quiche


This is a different sort of quiche than I've made before. It doesn't use any milk or cream, and there aren't even very many eggs in it. The surprising ingredient is anchovy fillets. I still had some left in the jar from when I made the amazing anchovy butter so it was a good excuse to use them up. If you are hesitant about the anchovies, don't be. They just add a really nice salty flavor - not fishy at all.

You start with a pre-baked pie shell (I used a whole wheat store-bought one to keep things simple), then you layer it with mashed anchovies, a filling of sauteed onions and tomatoes mixed with egg, a sprinkle of Parmesan cheese, then finally, sliced tomatoes. I thought the colorful heirloom tomatoes from our CSA would be great for this. This quiche was delicious - I wanted to devour the whole thing myself, and probably would have, if no one was looking.

CSA Week 19:


In the box: 1/2 pound spinach, 1.5 pounds heirloom tomatoes, 1 1/4 pounds broccoli, 2 pounds White Rose potatoes, 1 Acorn squash, 3 red bell peppers, 1 head garlic, 1 watermelon, 1 basket French Petite plums, 2 pounds Rome apples

Winter squash are here! We are so excited. Besides sweet potatoes, squash are one of our favorite winter vegetables. I'm sure there will be many times this winter where we will simply roast the squash and top it with nothing but butter and maybe a little brown sugar, but for our very first squash of the season I chose to make a soup. I used a recipe from one of my many Mark Bittman cookbooks: The Best Recipes in the World. It's a Laotian-style squash soup made with squash, onion, tomato, chickpeas, stock, coconut milk, and fish sauce. Pureed and topped with cilantro (and scallions if I had had any).


Whenever I see broccoli and potatoes together I immediately want to make one of my favorite meals: oven-roasted potatoes and broccoli topped with homemade mornay sauce. That's cheese sauce, people. I've blogged about it before. This time I used 2% milk and sharp cheddar. I roasted the potato wedges first, then when they were close to being done, I added chopped broccoli (florets and stems - peel stems first), since they don't take quite as much time as potatoes. Roasted broccoli is just amazing, right? It's got such a different flavor than when it's stir-fried or steamed. Amazing. Joe also bought some sweet Italian sausage links to add to the meal, so we cooked those first, in a skillet, then sliced and tossed with the roasted veggies. We didn't cook all the potatoes, so there are still a couple in the fridge for another time.

We made fajitas using the red bell peppers, along with a couple other colors of peppers and onions that we bought. They went into the grill basket in big pieces and then we thinly sliced them once they were done. We also grilled a huge piece of skirt steak that we marinated first in a mixture of garlic, Serrano chilis, oil, salt, and lots of lime juice.

We ate the watermelon and the plums for snacks. Garlic went into the stash.

For breakfast one morning, we had fried eggs over a mound of steamed spinach. It was healthy, but next time I think I would saute the spinach in a little oil or butter to add more flavor.

We still have a couple of potatoes, and we haven't done anything with the apples yet. Rome apples are good cooking apples.


Provencal Tomato Quiche
adapted from Julia Child - The Way to Cook
makes one 9-inch pie, serves 4-6

Note: Use fresh, in season tomatoes for this dish. Julia would have you peel the tomatoes, but I didn't bother and it was fine with us. For the seasonings, she doesn't give amounts, and I didn't measure, but I gave my best guess as to what I used, so at least it's a starting point. If you absolutely don't think you can stomach the anchovies, I think a good substitute would be kalamata olives, because they would provide a similar salty flavor.

2 cups sliced onions
about 1/4 cup olive oil
1 large clove garlic, pureed
5 medium fresh ripe tomatoes, peeled if you want, seeded, extra juice squeezed out, and chopped
1/4 teaspoon salt
1/8 teaspoon freshly ground black pepper
1/2 teaspoon oregano
Pinch cayenne pepper
1 tablespoon tomato paste (optional)
1 egg plus 3 yolks, lightly beaten
8 anchovy fillets packed in oil, drained and then mashed with 1 tablespoon olive oil
One 9-inch frozen pie shell
1/4 cup grated Parmesan or other hard cheese
1 or 2 large tomatoes, sliced, for topping the quiche

Preheat the oven to 375 F.

Unwrap frozen pie shell. Prick all over with a fork. Lay a piece of foil gently over the top, and fill with dried beans or pie weights. Bake for about 10 minutes.

Meanwhile, in a large frying pan, add 2 tablespoons of the oil and heat medium. When hot, add the onions and saute for 8-10 minutes, until tender but not browned. Add the garlic, the chopped tomatoes, and bring to a simmer. Cook like that for about 10 minutes, stirring frequently. Mash the tomatoes with the back of the spoon a little bit if needed; the mixture should start to form a thick puree. Add the salt, pepper, oregano, cayenne, and tomato paste if needed, and stir to combine. Pour the mixture into a large glass bowl and let cool to tepid.

Once the mixture has cooled, stir in the eggs and parsley.

To assemble the quiche, start by spreading the mashed anchovies across the bottom of the pie shell. Next, pour the tomato/egg mixture into the shell, smoothing with a spatula. Sprinkle the cheese evenly across the surface, and then arrange the tomato slices on top. Salt lightly, and finish with a drizzle of olive oil.

Bake for 30-35 minutes. When it's done, it will be lightly puffed, and the crust will be nice and brown. 

Tuesday, July 19, 2011

French Breakfast Radishes and Anchovy Butter on Sliced Baguette


I think I can officially get on board with radishes. Why? Because I recently learned that it is perfectly acceptable to eat sandwiches that are composed entirely of butter and thinly sliced radishes.  It's a very French thing to do, in fact. The French are awesome.

What's more awesome than butter? Anchovy butter. Yes, you read that right. Mince up a few anchovy fillets, especially the kind packaged in oil, and stir them into a stick of softened butter. Add some minced chives, a little salt and pepper, and you have just made the best.thing.ever!

We literally could not stop eating this - the creamy, salty flavor is deliciously addicting. Definitely not the best thing to pair with a heavy steak dinner, but it can be balanced perfectly with a light soup or salad (and a good sweaty calorie-blasting cardio workout earlier in the day wouldn't hurt either!).

French Breakfast radishes are milder than regular radishes, but regular radishes would work here as well. I accidentally bought a 3-seed baguette at the store, but the seeds were fennel, sesame, and poppy, which actually were a nice compliment to the other flavors, so it turned out great in the end.

CSA Week 7:


In the box: 1 head lettuce, 1 bunch French Breakfast radishes, 1 cucumber, 1 pint Sungold Cherry tomatoes, 1 pound vine ripe tomatoes, 2 pounds Honeypod fava beans, 1 pound Romano beans, 1 pint strawberries, 1/2 pint red raspberries

We ate all the radishes with the anchovy butter.

We made Ellie Krieger's Garlic Basil Shrimp with the cherry tomatoes. We made a few changes, such as adding fava beans and serving alongside roasted potatoes instead of the orzo because I had potatoes leftover from last week and didn't have time to go to the store for the pasta.

A highlight of the week was Mahi Mahi with coconut rice and steamed Romano beans. I based this off of a blog post over at Liv Life and the original recipe from Sunset magazine. I used wild rice instead of white rice, which I think was an excellent choice because it has a nuttier flavor that compliments that chopped almonds that go into it. I did the same thing as Liv Life though - she mentioned in her blog post that she totally forgot to add the coconut flakes to the rice, and I spaced it too! What is up with that? Too funny!  I steamed our whole pile of Romano beans, plus a couple handfuls of snow peas from our garden. I placed the veggies on a sheet of foil, drizzled with water and a splash of white wine, then folded it up into a packet and placed it on the cooler side of the grill while the fish cooked. They came out perfectly tender.

The vine tomatoes, most of the cucumber, and the lettuce became salads for lunch/dinner throughout the week.

We ate the fruit as we usually do. We got an email from the farm to say that they had an overabundance of raspberries that week so they were offering a deal - a flat of berries for only $18. Score! We froze all of them right away. They were in little baskets inside the cardboard flat, and we just placed the whole flat in our chest freezer overnight just like that (ok, honestly, it was two days before I got around it them). Then I took each basket and shook the berries out into quart-sized ziplock freezer bags. Each berry still froze individually! I can't wait to start baking with them.


French Breakfast Radishes with Anchovy Butter on Sliced Baguette
adapted from Bon Appetit
Makes about 16

1/2 cup (1 stick) unsalted butter, at room temperature
2-3 anchovy fillets, finely chopped
2 tablespoons chopped fresh chives, plus more for garnish
Kosher salt and freshly ground black pepper
16 1/2-inch thick diagonal slices baguette
1 bunch French Breakfast Radishes (or regular radishes), trimmed and thinly sliced on the diagonal

Mix the butter, two of the minced anchovy fillets, and two tablespoons of the chives in a small bowl. Add the third minced anchovy fillet to taste, if desired. Season with salt and pepper.

Spread the anchovy butter over one side of each slice of baguette. Top with sliced radishes, overlapping slightly, garnish with additional chopped chives, and serve.

The anchovy butter will keep in the fridge for several days, if for some reason you don't finish it all right away.

Wednesday, March 9, 2011

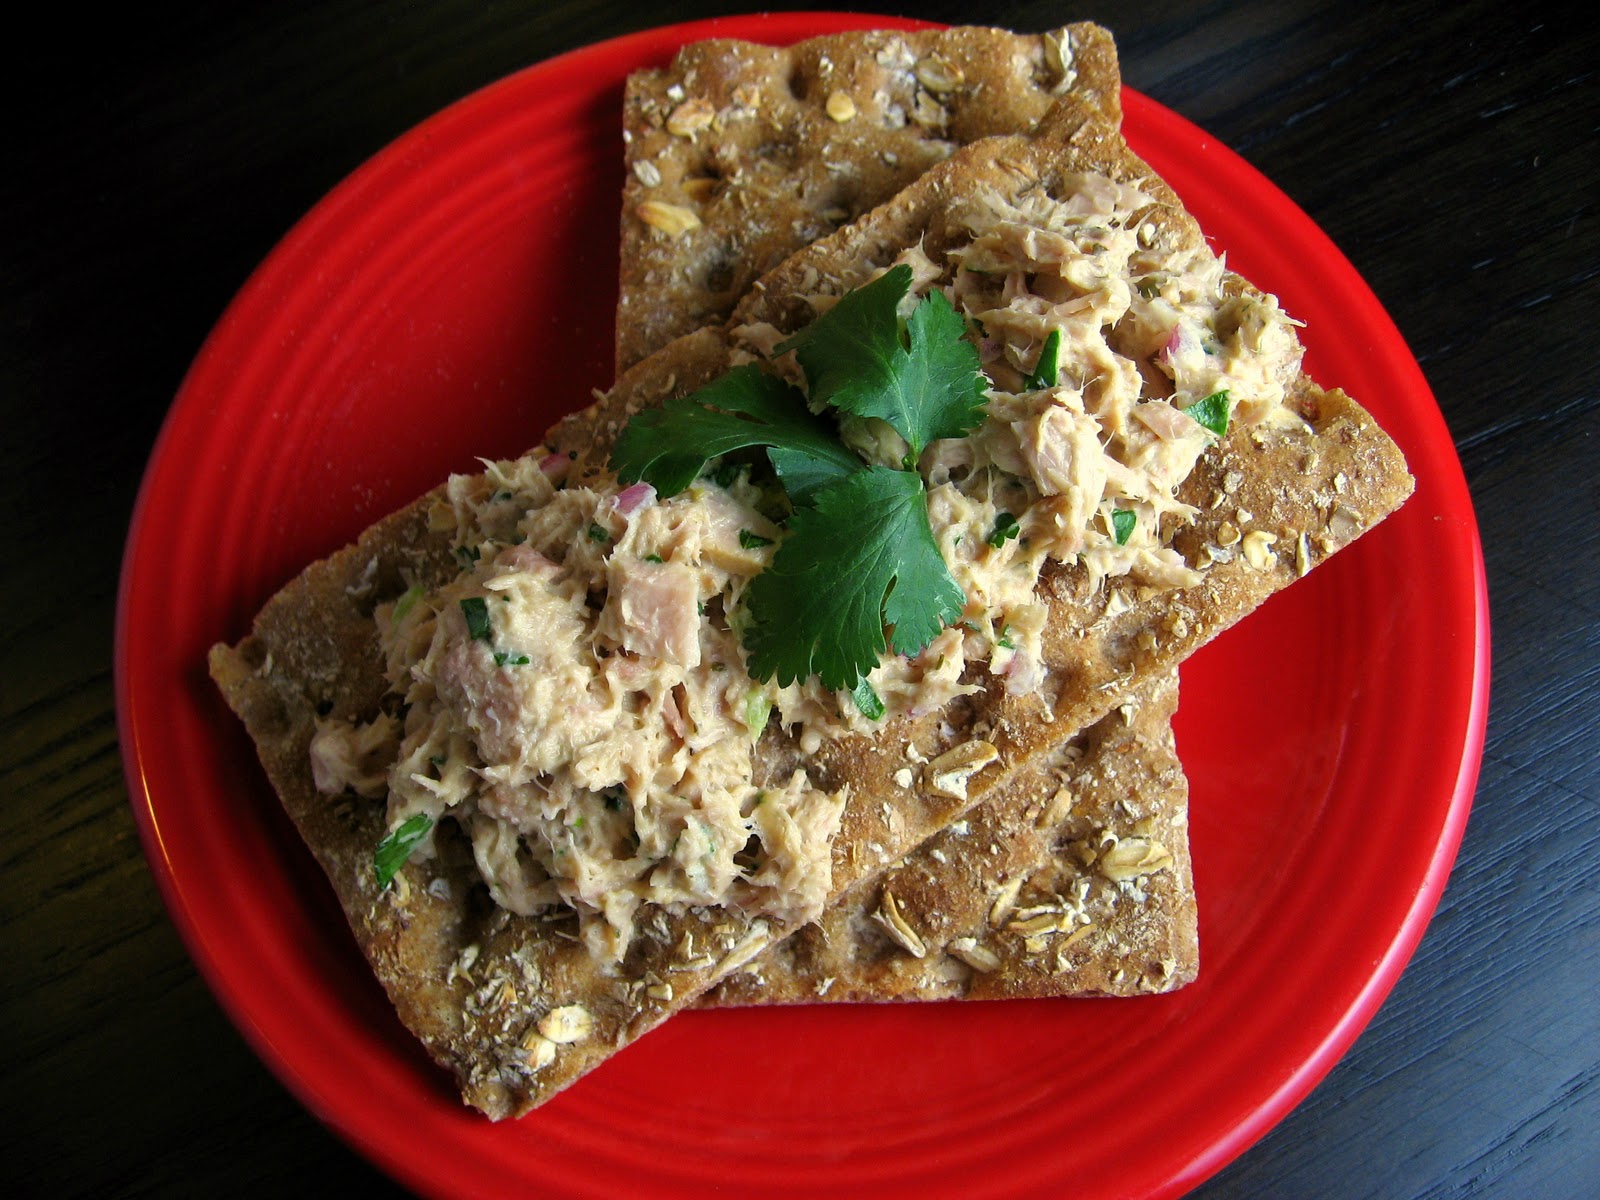
Yumm! Tuna Salad


Ah, my new favorite pastime: finding ways to incorporate Yumm! Sauce into everything I eat. This time, I used it instead of mayo in tuna salad. It was delicious, and made a great lunch to take to work!

I'm not a big fan of mayo. I only use it sparingly in recipes if I absolutely have to. I have never been one to spread it on sandwiches or burgers; it's one of those "picky eater" habits I still cling to as an adult. 

I am pretty sure I've always disliked the stuff, but I can say for sure that one experience I had as a kid sealed the deal. My sister and I were in elementary school at the time, and my mom was working there as a staff assistant. Some days after school we had to wait around for her while she was still working, so we'd hang out in the staff break room. One day, we were sent to wait there as usual, and saw a huge spread of food set out that was leftover from a lunch potluck earlier that day. My mom said we could help ourselves. So I grabbed a roll, spread on a large amount of butter - what I thought was butter - and took a bite. 

I could tell something was up with that butter. It did not taste right. I had to take a few bites to figure it out, but we finally realized what had happened: the mayo had turned yellow from sitting out all day, so it looked like butter. ::gags::

And that's why I don't like mayonnaise. That's also why you should never let perishable food sit out for more than two hours.

Remind me to tell you about the time my best friend got me to try tarter sauce - and how she conveniently "forgot" to tell me until afterwards that it's basically composed of mayo and pickles! Ok, that's pretty much the whole story right there. She's still my best friend, but I do not eat tarter sauce...

Anyway, now that I've (hopefully!) ruined your taste for mayonnaise, here is my recipe for Tuna Salad - sans Mayo!


Yumm! Tuna Salad
inspired by Cafe Yumm
makes about 6 servings

2-(6 ounce) cans tuna, packed in water
1/2 cup Yumm! sauce, original flavor
1-2 tablespoons minced red onion
1 tablespoon minced celery (optional)
1-2 tablespoons minced cilantro
1/2 tablespoon lime juice
Salt and freshly ground black pepper to taste

Drain tuna. Put tuna into a medium bowl, flaking it apart with a fork. Add remaining ingredients, stir to combine. 

Taste and adjust the flavor as needed by adding more of any of the ingredients as you see fit. I'm pretty sure I added more Yumm! sauce because I wanted a creamier tuna salad.

This will last for a several days in the fridge. It makes a great lunch as a sandwich or as a spread on crackers or crispbread. 

Sunday, January 23, 2011

Modern Bouillabaisse


I wanted to use up some seafood in our freezer - we had about a pound of cod fillets and a pound of shrimp, so this soup was perfect for that purpose. I made a double batch because I knew I was going to give some to my friend our weekly meal exchange.

Bouillabaisse used to be made with whatever fish and market produce was available.  As people became more wealthy and better fish became more readily available, the vegetables became more of an afterthought.  Bittman describes this recipe as a "return to tradition", using lots of vegetables and plenty of flexibility in what kind of fish you can use.  

I'm not sure what happened, but it seemed that by doubling the ingredients, the volume of the soup increased exponentially. Has this ever happened to anyone else? Instead of the predicted 8 servings, I estimate that we had more like 16. I'm really not exaggerating here, nor am I really complaining. It's a soup that freezes well; we put about half of it into single serving tupperware containers and froze it right away. It's been about a week since we've made it and I've already had some for lunch.  It defrosted nicely in the microwave, and the vegetables, while more tender than they were originally, were still good.

This recipe gives you the option to use shrimp stock, which is incredibly easy to make. You make it from shrimp tails, which is a good use for something you are going to throw away anyway. Just put the tails into a saucepan with a few cups of water in it, then cover and simmer for about 15 minutes. Pour the liquid into a bowl or storage container - through a strainer first to remove the tails - and voila, shrimp stock. With this last 2 pound bag of shrimp we bought at Costco, we tried to remember to make a batch of shrimp stock every time we cooked with shrimp, and just kept the stock in the freezer until we needed it. You can also get fancy and add some chunks of onion, carrots, celery, lemon, or parsley stems to the simmering liquid.


Modern Bouillabaisse
adapted from Mark Bittman - Food Matters: A Guide to Conscious Eating
Serves 4?

1 tablespoon minced garlic
2 tablespoons olive oil
1 fennel bulb, thinly sliced
2 leeks, white and tender green parts, trimmed and cut into coins (or use onions)
Zest from one orange
Big pinch saffron (optional)
1 dried hot chile, or a pinch of cayenne, or to taste
1 sprig fresh tarragon (optional)
2 cups chopped tomatoes (canned are fine; drain them first)
About 1 1/2 pounds small red or white potatoes, peeled if you like (we didn't) and cut into wedges
About 1 pound almost any seafood, like monkfish, cod, scallops, squid, or shrimp; peeled, skinned, boned, and cut into chunks if needed
2 carrots or parsnips, cut into 1/4-inch coins (I used both)
2 stalks celery (with the leaves if you like) sliced into 1/4-1/2-inch slices
1/2 pound sugar snap or snow peas (optional)
2 cups vegetable, shrimp, or fish stock, dry white wine or water, plus more as needed
1/2 cup roughly chopped parsley leaves, or used chopped chervil or fennel fronds if you like
Salt and freshly ground black pepper
1 or 2 whole grain baguettes , cut crosswise into slices and toasted if you like (optional)

Heat a dutch oven or large pot over medium high heat and add the oil.  When the oil is hot, add the leeks, fennel, garlic, and orange zest.  Cook for 3-4 minutes, or until softened, stirring occasionally.  Add the saffron, if using, the chile or cayenne, and the tarragon, if using, and cook for just a minute.  Add the tomatoes and potatoes, and cover.

Check the potatoes after about 5 minutes.  If they are not yet beginning to get tender, cover and cook for another couple of minutes (since mine was a double batch, this part took forever).  Stick the potatoes with a fork, if the fork seems to meet with just a little resistance, then add the fish, carrots and/or parsnips, celery, snap peas or snow peas if using, and stock.  Add more stock or water if needed, just to cover the fish and the vegetables.

Bring the soup to a boil, then cover and turn off the heat.  Let the soup rest with the lid on for about 5 minutes.  At that time, the vegetables that you just added should be crisp tender, and the fish should be opaque and cooked through (our chunks of cod were flaking apart).  If the fish is not cooked at this point, move the pot back on the heat and bring it to a simmer again for a few minutes.  Fish doesn't really take that long to cook though.  Stir in the parsley, and add salt and pepper to taste.  Serve with the bread.

Saturday, October 16, 2010

Fish Fillets in a Curry Sauce with Gulf Coast-Style White Rice Pilaf


I love Indian food, but some recipes can be really time consuming.  This dish, however, is perfect for a weeknight.  We got the recipe from Madhur Jaffrey's Quick and Easy Indian Cooking.  All the recipes in this book are designed to be prepared in about thirty minutes.  I like Indian side dishes, so I often make those to go with plain baked chicken or tofu.  That way I am still making something cool but not expending a ton of effort.  In this case, I guess I paired an Indian main dish with a Mexican side dish.  The rice is from Mexican Everyday by Rick Bayless.  Plain white rice would have been fine too, since you have a curry sauce to soak it up, but Joe wanted to make this rice.  It has a really nice flavor that seems to complement just about everything we've made it with so far. 


Fish Fillets in a Curry Sauce
serves 4-5

Ideally, you would use dark, oily fish fillets from bluefish or mackerel, but any fish fillets - cod, haddock, halibut - will work.  We had a bag of frozen cod fillets from Costco so we used those.  Use the thickest fillets you can find, and it's optimal if the skin is removed.  I thought the curry sauce was quite spicy, so if you are a wuss about spice like I am, use half the amount of cayenne.  We used bread crumbs from the freezer; whenever I have extra crusty bread I made a big batch of bread crumbs and they can store indefinitely in the freezer.  They can be baked for a bit at a low temp in the oven if they seem moist when you remove them.    

2 pounds thick fish fillet or fillets
2 1/4 cups milk
1 teaspoon salt
Lots of freshly ground black pepper
1/2 teaspoon cayenne pepper
1/4 teaspoon ground tumeric
5 tablespoons bread crumbs, plus more if needed (made from dried bread, homemade or store bought)
4 tablespoons butter (1/2 stick) unsalted butter
1/4 cup curry powder
2 tablespoons all-purpose flour
3 tablespoons finely chopped fresh cilantro
2-3 tablespoons fresh lemon juice

Make sure you have a rack in the upper third of the oven and preheat to its highest temperature.  

Lay the fish in a baking dish.  Combine the milk, salt, pepper, cayenne, and tumeric in a large measuring cup or pitcher and pour over the fish.  Set aside for 15 minutes while you get the other ingredients ready.

Remove the fillets from the milk mixture and press into a plate of the breadcrumbs to cover all sides.  Five tablespoons wasn't really enough for us so we added more.  Reserve the milk (this will become the sauce, but don't worry, you'll boil it).  Put the fish into a shallow baking dish lined with foil.  Scatter two tablespoons of butter over the top of the fillets and bake for 15 minutes.

Meanwhile, pour the milk mixture into a small saucepan and turn the heat to medium-low.  You want it to heat but not boil in this step.  In a small, heavy saucepan, heat the remaining two tablespoons of butter over medium-low heat.  When bubbling, add the curry powder, and cook for one minute, stirring constantly.  Add the flour, and cook for two minutes, still stirring.  It should keep bubbling.  

Off heat, whisk in the hot milk.  Return the pan to the heat and turn it up to medium-high.  Stir with a whisk until the sauce comes to a boil, then let it boil for about a minute, whisking the whole time (If you don't whisk constantly, I predict that the milk will foam and overflow, creating a huge mess on your stovetop and burners, since that has happened to me when cooking other things like this).  Add the cilantro and lemon juice and stir to combine.  

To serve, place some fish on each plate and pour some sauce over the top.  Serve immediately.


Gulf Coast-Style White Rice Pilaf
serves 6-8

Note: Normally the recipe has you start the rice on the stove and finish in the oven.  However, since I was already using the oven for the fish, we cooked the rice completely on the stove-top, with great results.  We also added peas like his other rice recipe.  

1 1/2 tablespoons vegetable or olive oil
1 1/2 cups white rice
1 small white onion, chopped into 1/4-inch pieces
2 garlic cloves, peeled and finely chopped or crushed through a garlic press
1 3/4 cups chicken or vegetable broth (we are rocking the jar of bouillon these days)
Salt
3 tablespoons coarsely chopped flat-leaf parsley, for garnish

If using the oven, adjust the rack to the middle and heat to 350 F. Set a 3-quart oven-proof saucepan over medium heat.  When hot, add the oil, rice, and onion.  Cook for about 5 minutes, stirring frequently.  The goal is to get the grains of rice to turn from translucent to milky-white.  If you care about appearance, try not to let the rice brown, but if you don't care, don't worry about it.  Add the garlic and cook for a few seconds, until fragrant, then add the broth and 1 teaspoon salt (or more if using low sodium broth).  Stir to combine, then let it come up to a boil.  

If using the oven, cover the saucepan and place in the middle of the oven.  Bake for about 25 minutes (If adding peas, scatter about 1 1/2 cups of them - still frozen is ok - over the top of the rice after it has baked for 20 minutes, then re-cover and bake 5 minutes longer).  Remove from oven and let stand 5 minutes.  Fluff the rice with a fork (and mix in the peas), and sprinkle with the chopped parsley.  

If not using the oven, after the rice has come to a boil, turn the heat down to low and let it cook for about 20 minutes (just like you would normally make rice on the stove).  Add the peas over the top, and cook 5 minutes more.  Fluff with fork and sprinkle with parsley as above.  

Friday, June 18, 2010

Spicy Grilled Shrimp, Potatoes, and Bok Choy


We had some lovely weather last weekend, though it left entirely too quickly.  I'm beginning to think we'll be stuck in this "Juneuary" dreariness forever.

Sigh.

However, we did make use of the evening by cooking our entire meal outside.  We had some purple potatoes and bok choy from the CSA which we tossed with olive oil, salt, and pepper.  We bought some shrimp and made a spicy marinade ala Mark Bittman.  Then we just put everything on the grill.  It was exquisite.  We finally got to use our hot smoked paprika too!  The shrimp had some kick to it, but I didn't think it was super spicy, just enough to be really flavorful.


While waiting for the coals to heat up, I enjoyed a beer and a good book.  Seriously, give Sherlock Holmes a try if you've never read it, I'm really liking it!


Spicy Grilled (or broiled) Shrimp
adapted from Mark Bittman - How to Cook Everything
Serves 4

1 large clove garlic, peeled
1 tablespoon coarse salt
1/2 teaspoon cayenne
1 teaspoon paprika (we used hot smoked paprika and it was awesome
2 tablespoons extra virgin olive oil
2 teaspoons freshly squeezed lemon juice
About 1 1/2 pounds shrimp, 20-30 per pound, peeled, rinsed, and dried
Lemon wedges for serving

Heat a charcoal or gas grill or broiler until hot, and put the rack as close to the heat source as possible.  You are going to want to be able to cook these shrimp quickly so they get nice and charred but still juicy.

Mince and mash the garlic into the salt on a cutting board with a chef's knife until it forms a paste.  Transfer to a small bowl.  Add the cayenne and paprika, then the olive oil and lemon juice.  Hopefully it is still relatively paste-like.  Mine was a little liquidy, but it still works.  Smear this all over the shrimp.

Grill or broil the shrimp, turning once, for 2-3 minutes on each side.  Serve immediately or at room temperature, with lemon wedges on the side.

Monday, March 15, 2010

Shrimp and Squash Vindaloo


This will be my last entry for about a week; I'm going to southern California with my sister to hang out with a bunch of our fabulous relatives.  Whenever we go there to visit we always make sure to eat our fill of In-N-Out, and I'm sure this time will be no exception.  With that in mind, I made a relatively light dinner tonight.

One of the perks of being a lifetime member of Weight Watchers (or even just a member in general) is that you get these weekly emails full of motivational tips and light recipe ideas.  The one I made tonight was a stew called a Vindaloo, which means "wine and garlic".  It was originally a Portuguese dish, but it eventually migrated over to India where it evolved into a spicy curry dish.  This particular recipe is healthier than the types of Vindaloo you might find at an Indian restaurant because you use squash instead of potatoes, and shrimp instead of lamb, chicken, or pork.

This meal was tasty, but SO SPICY!  I'm a total wimp about spice, but even Joe thought it was pretty spicy (but not so spicy that he didn't like it).  If you like spicy food, then you'll probably like this recipe.  If you are not a fan, then I would suggest omitting the cayenne completely.  I ended up drinking two full glasses of milk to get through this meal (that's alright though, I usually don't get enough calcium and vitamin D anyway).  If you had cream or half-n-half, you could drizzle a little bit into your bowl and that would help cool it down a bit as well.


Shrimp and Squash Vindaloo
adapted from Weight Watchers Everyday Gourmet (via email newsletter)
serves 4

2 tablespoons white wine vinegar
2 tablespoons curry powder
1/2 teaspoon ground cinnamon
1/2 teaspoon ground cumin
1/2 teaspoon ground ginger
1/4 teaspoon salt
1/4 teaspoon cayenne pepper, optional
1 medium acorn squash (I used two smallish ones)
1 spray nonstick cooking spray
3 medium shallots, peeled and minced
2 garlic cloves, minced
2 cups fat-free, no-sodium vegetable broth
1 pound medium shrimp (at about 35 shrimp per pound), peeled and deveined

Combine the spices (curry powder through cayenne) with the vinegar in a small bowl.  Stir until you've made a paste.  Set aside.

Cut your squash in half, remove the seeds and pulp.  Set the squash halves cut side down on a cutting board and use a knife or sharp vegetable peeler to shave off the skin.  Cut the flesh into 1-inch cubes (some of the skin will be easier to remove once you've cut the flesh into smaller pieces).  Set aside.

Apply the nonstick spray to the inside of a large saucepan.  Heat over medium.  When hot, add the shallot and garlic.  Stir often as it cooks for about three minutes.  I had to add a little olive oil (about a teaspoon) because all the oil had dried up and you don't want the garlic to brown.

Add the prepared curry paste, attempting as best as you can to break it up somewhat.  After about 15 seconds, add the squash.  Stir constantly to coat with the spices (don't worry if it doesn't really).  After about 20 seconds, add the broth and bring to a simmer (I spent a couple of minutes trying to find clumps of spice and breaking them up by pressing them to the side of the pan with my wooden spoon).  Cover and reduce the heat to low, so it simmers gently, until the squash is tender, about 40 minutes.  Stir occasionally.

Add the shrimp and cover again.  Cook for about three minutes, or until the shrimp are pink and firm.

Serving size: 1 1/4 cups, 4 Points each serving

Sunday, March 7, 2010

Maple-Soy Glazed Salmon with Kailkenny


This salmon recipe will always have a special place in my heart, because it was what Joe cooked for me on the night he proposed (September 24, 2008 - I thought we were just going to be celebrating our 4 year anniversary).

I think maple syrup and soy sauce are a great pairing; together they create the perfect blend of sweet and salty flavors to compliment the salmon.  It would probably also be a good topping for chicken, pork, tofu, or even just vegetables and rice.

The side dish was inspired from a cookbook I picked up for 50 cents at the local library book sale a week or so ago called Gourmet's America (as in Gourmet Magazine).  The book is divided up by regions of the U.S., with each section featuring recipes that are traditional to that area.  I chose a recipe from the Mid-Atlantic region called Kailkenny, which is essentially mashed potatoes with kale mixed in.  Other versions I found on the internet used cabbage instead of kale.

Cuisine in the mid-Atlantic (so that would include Delaware, Maryland, Pennsylvania, New Jersey, New York, District of Columbia, Virginia, and West Virginia) has been influenced by a plethora of ethnic groups, since Ellis Island was the main arrival point for immigrants in the 1800's.  Some states also lie below the Mason-Dixon line (i.e., generally considered to be the boundary between the Northern and Southern United States, so there is also a strong southern influence in some of the cuisine as well.

We liked the Kailkenny alot!  The sauteed onions in butter really added a lot of flavor, and I loved sneaking in some healthy kale to an otherwise plain starch.  What I didn't notice before I started making the Kailkenny was that it made enough for 8 servings!  What was I supposed do with all those leftover mashed potatoes?!  Answer: Shepard's Pie!  That recipe to follow in a day or two!

Maple-Soy Glazed Salmon
Serves 4

1/2 cup maple syrup
1/4 cup soy sauce
4 salmon fillets (6 ounces each), 1 1/4 inches thick
Salt and Pepper
2 teaspoons sesame seeds, toasted

Make sure you have an oven rack set to the upper-middle position, and preheat the oven to 500 F.

Combine the maple syrup and soy sauce in a small saucepan and bring to a simmer over medium-high heat.  Cook until the mixture has reduced to about 1/2 cup and looks syrupy, about 4-6 minutes.

Meanwhile, look over the salmon and remove any pin bones (Joe did this by running his fingers over the salmon feeling for little bumps, which indicate a pin bone.  They can be removed with needle-nose pliers or tweezers).  Pat the salmon dry with paper towels, and season with salt and pepper.  Lightly oil a 9 x 13 inch baking dish.  Place the salmon into the dish, skin side down, spaced at least 1 inch apart.  Bake for 5 minutes.

Use a pastry brush to spread a generous layer of the maple-soy glaze over all visible surfaces of the salmon.  Bake for about 5 more minutes, or until the fish has turned from translucent to opaque (we used a fork to flake open the fillet a bit).

Before serving, brush the fillets with more glaze and sprinkle with the toasted sesame seeds.

Kailkenny (Kale and Mashed Potatoes)
adapted from Gourmet's America
Serves 8 (just make half if you don't want leftovers)

1 pound kale, stemmed and washed well
1 1/2 cups minced onion
1/2 stick (1/4 cup) unsalted butter (don't freak out, remember this serves 8!)
2 pounds russet (baking) potatoes
1/4 cup scalded milk if desired (I didn't feel like looking up what "scalded" actually meant, but I figured it was just basically warm milk, so I just microwaved it to warm it up a bit)

Bring a pot of salted water to a boil for the kale.  

While you are waiting for that, peel and quarter the potatoes, and place them into a large saucepan.  Cover with water by about two inches and bring that to a boil.  Once the potatoes are boiling, reduce the heat and let those simmer, partially covered, for 15-20 minutes.  

Once the water for the kale is boiling, add the kale and cook over moderately high heat until tender, about 5 minutes.  Reserve 1/2 cup of the cooking liquid before draining the kale into a colander.  Use a spatula to press out the excess liquid, or use a salad spinner.  Chop coarsely and set aside.

Saute the onion in the butter in a large skillet over medium heat, stirring, until softened.  Add the kale, season with salt and pepper and cook over low heat, stirring, for about a minute.  

When the potatoes are tender, drain.  At this point, the recipes instructs you to run them through a food mill or ricer into the saucepan.  I don't have either of these things, but I do just fine with my potato masher, (it's even Nylon so it won't damage nonstick surfaces) so I just added the potatoes back to the pot and mashed away until they were nice and smooth.  Mix in the reserved cooking liquid, the milk if using, and season with salt and pepper (we needed to add quite a bit of salt, just keep tasting and adding until you get it right).  

Thursday, February 18, 2010

Salmon Cakes with Cheesy Leeks


Joe picked the recipe for the salmon this week: Pan-fried Salmon Cakes from our well-loved America's Test Kitchen Family Cookbook.

I love this recipe because most of the ingredients are things you could conceivably have on hand (we only had to buy a lemon).  The cookbook is really great too - lots of good solid basic recipes with variations to keep things interesting.  It helped us to realize that you can make a lot of meals from scratch using really basic ingredients, rather than buying a packet or pre-made boxed mix.  It doesn't take that much longer, and it's healthier because you have total control over everything that goes in the dish.

To go with the salmon cakes I made a quick side dish with leeks, cream, and cheddar cheese.  Can't really go wrong with those ingredients!

Pan-fried Salmon Cakes
adapted from America's Test Kitchen Family Cookbook
Serves 4

1 1/2 pounds salmon fillets, skin removed
1 1/4 cups plain dried breadcrumbs (we needed more than this)
1/4 cup mayonnaise
1/4 cup grated onion
2 tablespoons minced fresh parsley
1 1/2 tablespoons fresh lemon juice
3/4 teaspoon salt
1/2 cup all-purpose flour
2 large eggs, lightly beaten
1/2 cup vegetable oil
Lemon wedges (for serving)

After removing the skin from the salmon, check for any pin bones by rubbing your  fingers over the fish.  Pat the fillets dry with paper towels, then cut into 1-inch chunks.  Put half the salmon into the food processor and pulse until just minced- be careful not to puree.  Repeat with the other half.

In a large bowl, add the salmon, mayo, onion, parsley, lemon juice, salt, and 1/4 cup of the breadcrumbs, and mix gently with a spatula.  Evenly divide the mixture so that you can form eight patties, each about 2 1/2 inches wide.  Lay them on a large plate lined with plastic wrap, and freeze until firm, about 15 minutes.

Make an assembly line of three plates, leading up to the pan you're going to fry the salmon cakes in.  The first plate is for the flour, the next one for the eggs, and the last one is for the rest of the breadcrumbs.  Dredge the cakes through each coating one at a time, pressing down on the breadcrumbs to make sure they stick.  Either do them as you go (which is what we did) or do as they suggest, which is to coat them all first and then start cooking them.

Regardless, heat your oil over med/high heat in a large nonstick skillet (oops, we didn't use nonstick - but they came out fine) until it shimmers.  Cook in batches or all at once depending on how large a skillet you have, until golden on both sides which takes about 4-6 minutes.  Have a plate lined with paper towels ready to put the finished cakes on to let them drain a little before serving.  Serve with the lemon wedges.


Cheesy Creamy Leeks
adapted from Best Ever Three and Four Ingredient Cookbook
Serves 4

4 large leeks
2/3 cup heavy cream
3 ounces sharp Cheddar or Monterey Jack, shredded (they also suggest Swiss or Gruyere for a milder flavor)
1 tablespoon olive oil
Salt and freshly ground black pepper

Preheat your oven to broil.

Trim most of the green (tougher) parts off of the leeks and slice in half lengthwise.  Wash the dirt out of the outermost layers but keep them intact as much as possible.

Heat your oil in a large skillet.  Add the leeks, season with salt and pepper (but if you forget to season them at this time, like I did, never fear, you can do it later).  Cook, turning them and stirring occasionally, until they start to turn golden brown, about 4 minutes.  Most of them fell apart but that's ok.

Pour the cream into the pan and stir.  Let it simmer for a couple of minutes, then pour everything into a shallow baking dish.  Top with the cheese.  Broil 4-5 minutes or until the cheese is bubbling away and starting to turn golden.

Side note: while it might be more elegant to serve the leeks in long strips like they suggest, I found them to be a little impractical to eat -- they were difficult to cut with a regular table knife and fork.  If I were making this again I would slice them in half lengthwise like they say, but also crosswise into 2-inch pieces.  It might not be as impressive in the serving dish but it would be easier to eat I think.
Related Posts Plugin for WordPress, Blogger...