Friday, December 31, 2010

Smoky-Spicy Sweet Potato Soup


First off, I just wanted to point out a new feature that Joe added to my blog: a print-friendly button!  It's way at the bottom of each entry, and it will take you to a preview screen where you can then click a button to remove all images if you'd like, and you can also click on the text to remove any paragraphs that you don't want to print, such as my summaries at the beginnings of each post.  Also, if you delete something you didn't mean to, there is an 'undo' button at the top.

Now, onto the real post: a soup that we actually made before Christmas.  I'm finally getting back into blogging mode after a lovely and relaxing holiday season.

To be perfectly honest, I didn't have high hopes for this soup.  About a month ago I made a smoky pumpkin soup that was only so-so (hence, the reason I chose not to blog about it), and I was about ready to throw in the towel and admit that I just wasn't a fan of smoky soups.  Luckily, I was proved wrong - so wrong - with this recipe.  It was amazing!

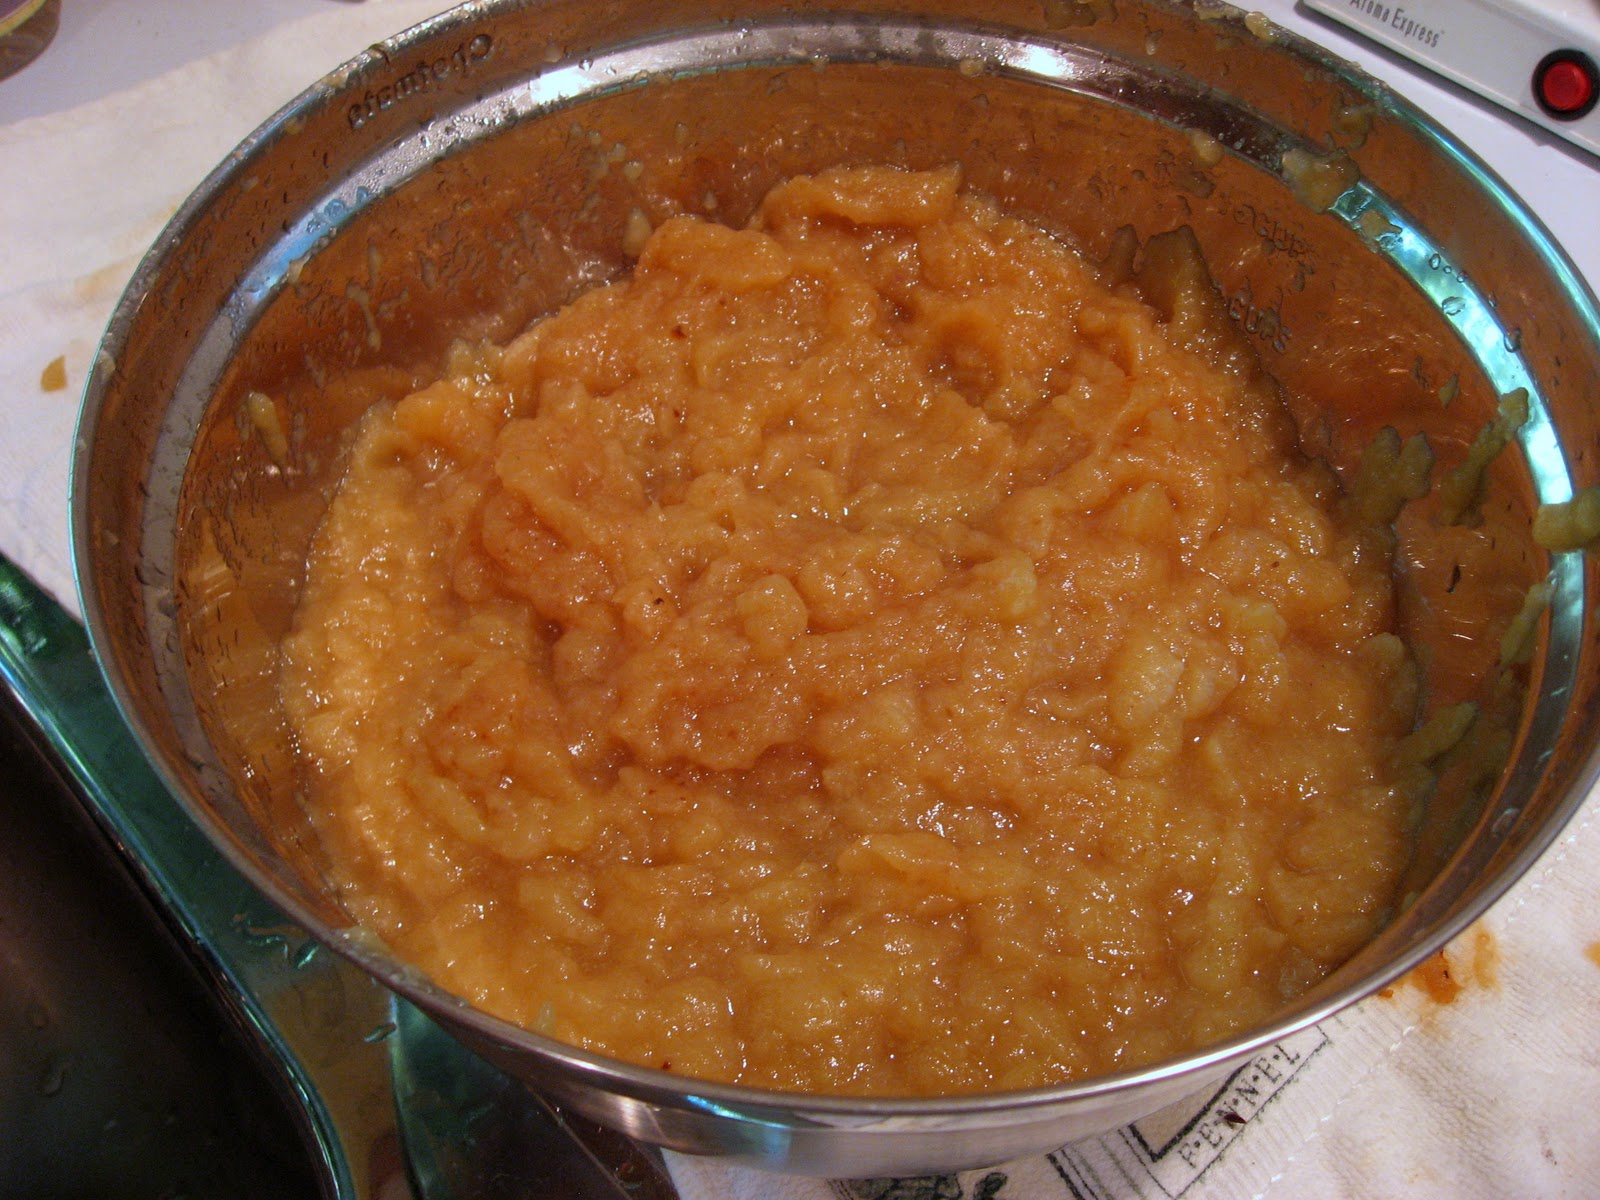
One thing that I have been unhappy with in some of the other pureed soups that I've made in the past is the texture.  They tend to be a bit...mealy.  Not silky smooth like pureed soups I get in restaurants.  For this recipe, we used our immersion blender as usual, but we kept going longer than we have in the past, and I think that was the ticket; we just weren't doing it long enough.  Gold star for improvement!

This soup achieves its bright orange color from a combination of orange-fleshed sweet potatoes and some carrot, which I nearly forgot to add!  The carrot was shredded, sitting in a container by all the other ingredients, yet it somehow never made it into the pot.  When the soup was almost done I finally noticed it.  I'm sure it wouldn't have made much difference if I omitted it, nevertheless, I got out a little skillet and quickly sauteed it on it own, to catch it up with the other already softened veggies, and threw it in right before we pureed the soup.

Personally, I thought the soup had a quite a bit of heat to it, so I used a lot of sour cream.  I mixed a little into the soup, but that seemed to dull its cooling effect, so I found that I preferred to have a spoonful of the sour cream perched on the rim of my soup bowl, so I could dab a little onto my spoon with each bite of soup, thus increasing its spice-neutralizing ability.  We also made some pepper-jack quesadillas to go with the soup.

In case you are new to my blog, refer to my previous tip on what to do with the rest of the can of chipotle peppers.  It's not really my tip of course; I was given the suggestion by a co-worker a few years ago.

This recipe calls for either honey or maple syrup.  I grew up on Mrs. Butterworth's and it wasn't until I was much older that I learned to appreciate the taste of real maple syrup.  Now that's the only kind we buy.  Maple syrup comes in Grades A or B.  The best kind is Grade B.  While Grade A is more common in stores and cheaper, it is lighter and has a little less flavor.  That's what I've read anyway; I can't guarantee that I would be able to tell the difference in a taste test (maybe I should try sometime!).  Either way, it's still a better choice than pancake or waffle syrup (aka, Aunt Jemima and Mrs. Butterworth's).  That stuff is really cheap, but doesn't have any actual maple sugar in it at all; it's mostly made of high-fructose corn syrup!  Even though maple syrup is more expensive, you don't have to use as much because the flavor is so much more intense, so you can make it last longer.  If you use the cheap fake stuff, you pour on a lot and it still doesn't even really taste like anything, not to mention it doesn't even soak into your pancake because it's so viscous from all the weird stuff they add to it.


Smoky-Spicy Sweet Potato Soup
adapted from Every Day with Rachael Ray Magazine - October 2008
Makes 4 very generous portions

4 sweet potatoes (2 1/2 pounds), peeled and sliced 1-inch thick
Salt
1 tablespoon extra-virgin olive oil
4 slices smoky bacon, chopped (we just used regular bacon)
1 large onion, chopped
1 large carrot, peeled and shredded
1 chipotle pepper in adobo sauce, chopped, plus 2 teaspoons adobo sauce (if you don't want it very spicy, use only half of a pepper, and remove the seeds first)
5 sprigs thyme
1 bay leaf
32 ounces chicken broth
1 teaspoon grated peel and juice of 1 orange
1/8 teaspoon ground cinnamon
Honey or maple syrup, for drizzling
Pepper
Sour cream, for passing at the table.

Add the sweet potatoes to a large saucepan and add water to cover.  Bring to a boil, add some salt, and cook until tender, about 12-15 minutes.  Drain, return to pot.

Meanwhile, heat the oil over medium-high heat in a medium pot.  Add the bacon and cook for about 5 minutes, until crisp, stirring often.  Transfer to a paper-towel lined plate.  Try not to sneak too many bites, as you will need this later for garnishing the soup.

Discard all but about 2 tablespoons of the bacon  fat.  Add the onion, carrot, chipotle pepper, adobo sauce, thyme sprigs, and bay leaf.  Cook for about 6-7 minutes, or until the onions have softened.  Stir in the chicken broth, orange peel, orange juice and cinnamon.  Drizzle with honey or maple syrup and season with salt and pepper.  Let simmer for about 5 minutes.  Around the time the potatoes should be done.  Remove and discard the thyme sprigs and bay leaf.

Add the broth mixture to the pot of sweet potatoes.  Puree until silky smooth with an immersion blender (or puree in batches in a food processor or blender).

Serve the soup with sour cream and bacon on top.

Monday, December 20, 2010

Chewy Chocolate Gingerbread Cookies


I don't do a lot of baking.  Occasionally, I'll bake a treat for a friend's birthday or other special event, but I don't bake just for the heck of it. It's not that I can't do it or that I don't like it.  I just find it hard to fit that kind of food into my diet and still maintain my weight.  I don't have the best self control when it comes to having sweets around, so I usually just don't keep cookies or cake or anything in the house if I can help it.  I'm not the type to make a batch of cookies last all week.  One day, maybe two, and they're gone.  I would bring the rest of the batch in to work, but it seems like everyone is watching what they eat these days, so I try to keep that to a minimum.


However, I always make an exception for the holidays.  I try not to go crazy, but I give in and make a few different kinds of cookies or sweets.  It's fun, it's satisfying when the end result is successful, and it makes you feel good when people ooh and aah over what you've made for them. :-)


I had a lot of molasses in the pantry (from the Thanksgiving dessert) so I decided I was going to make some kind of gingerbread cookie.  I finally settled on Martha Stewart's Chewy Chocolate Gingerbread cookies.  Incidentally, it's the cookie that is pictured on the cover of her cookie cookbook.  Let me warn you: these cookies are dangerous!  They are hands down one of the best cookies I've had in a long time.  I had a hard time restraining myself when I packaged up most of the first batch to ship away to my relatives.  They are bursting with all the classic flavors of a gingerbread cookie, due to a combination of fresh ginger, ground ginger, and molasses.  They have a delightfully chewy texture that is interspersed with bits of semi-sweet chocolate chunks.  I can't really say enough good things about these cookies.  I will be making another batch later this week to share with our families when we visit for Christmas!

Note the ooey-gooey chocolate :-)
Chewy Chocolate Gingerbread Cookies
adapted from Martha Stewart's Cookies
makes 2 dozen

Notes:  Another reason I love this recipe is because you can make them over the course of two days.  Make the dough one day, refrigerate, and roll and bake the cookies the next day.  You can just chill the dough for two hours, but at that point, my evening would be about over anyway.  So if you work all day and cook in the evening hours like me, baking the cookies the next day is the way to go.

1 1/2 cups plus 1 tablespoon all-purpose flour
1 1/4 teaspoons ground ginger
1 teaspoon ground cinnamon
1/4 teaspoon ground cloves
1/4 teaspoon freshly grated nutmeg
1 tablespoon unsweetened Dutch-processed cocoa powder
1/4 pound (1 stick) unsalted butter, room temperature
1 tablespoon freshly grated peeled ginger
1/2 cup packed dark brown sugar
1/2 cup unsulfured molasses
1 teaspoon baking soda
1 1/2 teaspoons boiling water
7 ounces best-quality semi-sweet chocolate, cut into 1/4-inch chunks
1/4 cup granulated sugar

Line two baking sheets with parchment paper.  Set aside.  If you're planning on baking the cookies the next day, you can skip this step for now.

In a large bowl, sift together the flour, ground ginger, cinnamon, cloves, nutmeg, and cocoa.

Using an electric mixer fitted with the paddle attachment, beat the butter and fresh ginger together for about 4 minutes, or until the mixture has lightened.  Add the brown sugar, mix until combined, then add the molasses, mix until combined.

In a small bowl, dissolve the baking soda in the boiling water.  (I boiled the minimum amount of water in our electric tea kettle, about 2 cups, then carefully measured the correct amount into the bowl.  Make a cup of tea with the extra water, if you want).  Beat half of the flour mixture into the butter mixture.  Beat in the baking soda mixture, then the other half of the flour mixture.  Stir in the chocolate chunks, and turn out onto a sheet of plastic wrap.  Pat out the dough into a square or rectangle-like shape, about 1-inch thick; seal with wrap.  Refrigerate until firm, 2 hours, or overnight.  Martha did not suggest making the dough into a square or a rectangle, but I found it helpful the next day when it came time to roll the dough into balls.  If the dough is in a square or rectangle, you can use a pizza cutter to make a grid of 24 squares, making sure you make the full 2 dozen cookies.

Preheat your oven to 325 F.  Line two baking sheets with parchment if you haven't already.

Roll the dough into 1 1/2 inch balls, and place two inches apart on baking sheets.  Do not compromise on the two inches, these cookies spread out as they bake, just suck it up and do several batches if you have small baking sheets like me.  Chill on the baking sheets for 20 minutes.  For my second batch, I rolled all the balls at once and placed them on a large platter, put that in the fridge, then removed the balls as needed when it was time to fill a sheet to bake, since I had to do a few batches.  That seemed to work fine, just be sure to let your baking sheets cool between batches.

After chilling, rolls the balls in granulated sugar.  Be generous here, even though it looks like a lot of sugar.  The cookies will spread out as they bake, so the sugar will not look as concentrated over the surface of the cookie once they are done.

Martha says to bake the cookies until the surfaces just begin to crack, about 10-12 minutes, rotating the pan halfway through.  Let cool for 5 minutes on the cookie sheet, then transfer to a wire rack to cool completely.  For my first batch, I took them out right when she said, when they were just beginning to crack, but I thought they were too soft and underdone, though definitely not inedible.  For my second batch, I let them bake until the surfaces had formed good sized cracks, still about 12 minutes or so, and they were perfect.  It could be a difference in oven temperature, or some other factor, I don't know.

Cookies are best the day they are made, but you can store them in an airtight container at room temperature for up to 5 days.  I highly doubt they will be around that long though.

Sunday, December 5, 2010

Thanksgiving Leftovers: Shepherd's Pie


I love homemade mashed potatoes, but I can get tired of them pretty quickly.  A good way to use up leftovers is to put them on top of Shepherd's pie.  I have already posted one recipe for a sweet potato Shepherd's pie from Natural Home Magazine, and tonight I made a version from the Tillamook Cheese Cookbook.  It's actually quite a nice cookbook, especially if you are a fan of Tillamook Cheese like me.  Joe and I spent a weekend at the coast this past summer so of course we had to stop by the factory for the free cheese samples!

Shepherd's pie with salad on the side.

Shepherd's Pie topped with Cheddar Mashed Potatoes
adapted from the Tillamook Cheese Cookbook
serves 4

Notes: I only had about half of the mashed potatoes it called for so I planned to just make half the recipe, which would be four servings instead of 8.  As I am typing this up however, it occurs to me that the only ingredients I actually halved were the ground beef, the mashed potatoes, and the cheese.  I accidentally used the full amount of everything else!  Since we thought it tasted really good that way, I'm going to type the recipe up that way too.  :-)

1 pound extra-lean ground beef
2 tablespoons vegetable oil
1 cup diced onion
1 large carrot, diced
1 teaspoon minced garlic
2 tablespoons Worcestershire sauce
2 tablespoons tomato paste
1-14 ounce can crushed tomatoes
1/8 teaspoon freshly ground black pepper
2 cups mashed potatoes
2 cups shredded Tillamook Sharp Cheddar cheese, divided
2 tablespoons freshly chopped parsley

Preheat the oven to 375 F.  Heat the oil in a large skillet over medium-high heat.  Saute the onion and carrot for 8-10 minutes, or until softened.  Add the garlic and cook for another 3 minutes.  Add the ground beef, breaking it up with a wooden spoon, and cook until browned.  Add the Worcestershire, tomato paste, crushed tomatoes, and pepper.  Cook until the mixture has thickened, about 10 minutes.  Spoon the mixture into a 9x9 baking dish.

In a medium bowl, combine the mashed potatoes with 1/2 of the cheese and the parsley.  Spread this potato mixture over the top of the beef mixture with a spatula.  Sprinkle the remaining cheese over the top.  Place the pan onto a baking sheet (I guess this is in case the mixture bubbles over.  It didn't when I made it, but it's not a bad idea, just in case) and bake until it bubbles, about 25 minutes.

Thursday, December 2, 2010

Thanksgiving Leftovers: Baked Delicata Squash stuffed with Turkey and Wild Rice


We had two delicious Thanksgiving dinners this year (one at each of our parent's houses), and we took home full sets of leftovers from each.  That's a lot of turkey!  Besides the usual sandwiches, I used some of it to make an improvised turkey soup with mushroom broth, dried shiitakes, and wild rice, which was delicious.  I ate it for lunch every day this week!  


I still had more though, and we have lots of winter squashes lying around, so I decided to bake a delicata squash and fill it with a mixture of shredded turkey, wild rice, parsley, and cheese.  I got the basic idea from a recipe in Robin Miller's Quick Fix Meals (she used butternut squash and chicken).  Miller has you microwave the squash, to save time, no doubt, but I since prefer baked squash, I looked to a recipe I like over at allrecipes.com for baking instructions (It's called "Delicata Delish", and it lives up to it's name, even though, oddly enough, the picture on their website looks like stuffed zucchini rather than delicata).

I love squash, so of course this meal was a hit with me!


Stuffed delicata squash with turkey, wild rice, and fresh herbs
adapted from Robin Miller - Quick Fix Meals, and allrecipes.com - Delicata Delish
serves 2

Notes: I made a lot of changes to Robin Miller's recipe, mostly because I was just using it as a guide to use what I had on hand.  I used wild rice instead of brown, turkey instead of chicken, I left out the cumin and sour cream, and used havarti instead of goat cheese.  But I always try to give the source of where I get my ideas from, so there you go.  There are lots of ways to modify this meal.  You could use almost any winter squash (except spaghetti).  Swap out the turkey for cooked chicken.  Any kind of rice will be fine, leftover from another meal, or made fresh that night.  You could use a wide variety of cheeses and whatever fresh herbs you have.

1 large Delicata squash, halved and seeded
2 tablespoons salted butter
salt and freshly ground black pepper, to taste
2 cups cooked wild rice
1 heaping cup shredded turkey
1 tablespoon of fresh minced parsley
1/4 to 1/2 cup shredded cheese, such has havarti

Preheat oven to 350 F.  Place the squash cut side up in a baking dish.  Fill with about 1/4 inch of water.  Put 1 tablespoon of butter in each half and season with salt and pepper.  Cover with foil and bake for about 30 minutes, or until a fork pierces the flesh easily in several places.

Meanwhile, put the rice, turkey, and parsley into a pot and heat, just to warm through.  You could also use a microwave.

When the squash is done, remove from the oven and turn the broiler on.  Divide the mixture between the two halves, it will be heaping.  Sprinkle the cheese over the top.  Broil for a couple of minutes to melt the cheese, and serve.

Tuesday, November 30, 2010

Pumpkin Gingerbread Trifle


This was one of our Thanksgiving desserts this year.  There are lots of recipes out there for pumpkin trifles, but I chose this one from epicurious not only because it calls for homemade whipped cream, but the gingerbread part sounded amazing.

You absolutely could substitute a box of gingerbread mix and Cool Whip, but after tasting this trifle I would have to argue that it is totally worth it to make the gingerbread and the whipped cream from scratch.  The gingerbread was spicy, sweet, and had a light, fluffy texture.  The recipe calls for both molasses and dark brown sugar (and since brown sugar is really just molasses mixed with white sugar, that's a lot of molasses!).


It specifically said not to use blackstrap molasses so I bought another kind (I just bought the only bottle I could find that didn't have the word "blackstrap" anywhere on it).  Molasses is the byproduct of refining cane sugar into table (white) sugar.  Each time the sugar syrup is boiled, the flavor intensifies and becomes slightly more bitter.  Sweet molasses is what you get from the first boiling, and that's (I think) what I used in my gingerbread.  Blackstrap molasses is made from the third boiling of the sugar syrup.  While it is a little more bitter in flavor, it also has a higher concentration of vitamins and minerals, making it a good choice of sweetener compared to white sugar, which is completely stripped of it's original vitamins and minerals.  I bet that's more than you ever wanted to know about molasses, but I found it very interesting!    

We made most of the trifle the day before (all except the very top layer of whipped cream) and transported it to my parent's house.  Right before we were ready to serve it, I whipped up some cream for the top.  The pumpkin mousse has unflavored gelatin in it, which seems to make it hold itself together so it doesn't soak into the gingerbread very much, which I guess is why you can make it the day before.


You want to hold off on that top layer of whipped cream until ready to serve because you can't cover the trifle dish with it on, at least that would have been my problem, as you can see in the photo below.  Next time I think I would take a little more care to make the layers straighter, but that's just because I am a perfectionist.  I would arrange the gingerbread in an even layer rather than just pile them in, and then I would pipe the mousse and whipped cream into the dish instead of spooning and spreading.  If you didn't have a trifle dish but wanted a nice presentation you could also use individual clear glass dishes or goblet-type glasses. 


Pumpkin Gingerbread Trifle
adapted from epicurious
serves 12

Note: You can make the gingerbread the day before you assemble the trifle if you want.  Just keep it in the pan at a cool room temperature, covered.  You can assemble the trifle, without the top layer of whipped cream, 1 day ahead.  Whip half the cream just before serving. 

For the gingerbread: 
2 cups all-purpose flour
1 teaspoon baking soda
2 teaspoons ground ginger
1/2 teaspoon cinnamon
1/2 teaspoon salt
1 stick unsalted butter, softened
1 cup packed dark brown sugar
1 large egg
1/2 cup mild molasses (not robust or blackstrap)
3/4 cup well-shaken buttermilk (not powdered)
1/2 cup hot water

For the pumpkin mousse:
1 (1/4 ounces) envelope unflavored gelatin
1/4 cup cold water
15 ounces pure pumpkin (canned or homemade puree)
1/2 cup packed light brown sugar
1/2 teaspoon cinnamon
1/2 teaspoon grated nutmeg (grate it fresh yourself for best flavor and aroma!)
1/2 teaspoon ground ginger
1/8 teaspoon salt
1 cup chilled heavy cream
1/2 teaspoon pure vanilla extract

For the whipped cream:
1 1/2 cups chilled heavy cream
3 tablespoons granulated sugar
1 teaspoon pure vanilla extract

To make the gingerbread:
Adjust an oven rack to the middle position and preheat the oven to 350 F.  Line a 13x9-inch pan with a layer of foil, then butter the foil.  Set aside.

In a medium bowl, add the flour, baking soda, spices, and salt, and whisk to combine.

In an electric mixer, beat together the butter and brown sugar at medium speed for 3-5 minutes, or until pale and fluffy.  Add the egg and beat until blended.  Add the molasses and buttermilk and beat until blended.  Lower the speed and mix in the dry ingredients until smooth.  Add hot water and beat for one minute (batter may look curdled).

Pour batter evenly into pan and bake for about 35-40 minutes, or until a toothpick inserted into the center comes out clean.  Let cool in pan.  Get the gingerbread out of the pan by lifting up on the foil.  Gingerly (haha) transfer to a cutting board and cut into 1-inch cubes.  They say to use a serrated knife but I had better luck with my santoku.

To make the pumpkin mousse: 
Put the water into a small saucepan and sprinkle the gelatin over the top.  Let soften for one minute, then bring to a simmer, stirring until all the gelatin has dissolved.  Whisk this mixture together with the pumpkin, brown sugar, spices, and salt in a large bowl until thoroughly combined.

Clean your electric mixing bowl and beaters from making the gingerbread.  Beat the cream and vanilla until they hold soft peaks, then gently, but thoroughly, fold into the pumpkin mixture.

To make the whipped cream: 
You can just use the same electric mixing bowl and beaters as you just used for the mousse.  Beat the cream with the sugar and vanilla until it holds soft peaks.

To assemble the trifle: 
You can either be very "Type A" about this or more laid back, it's up to you.  Put about half of the gingerbread cubes into the bottom of the trifle bowl.  Top with about half of the pumpkin mousse, then half of the whipped cream.  Add the rest of the gingerbread, then the rest of the mousse, then the rest of the whipped cream.  Chill for at least 2 hours, then serve.  

Sunday, November 28, 2010

Sweet Potato Biscuits with Cinnamon Honey Butter


We made these biscuits back in July for my dad's birthday, and they were requested again for Thanksgiving.  The first time we ate them picnic-style with fried chicken and slaw.  This time we ate them warm with homemade cinnamon honey butter!  We were going for a simpler Thanksgiving meal this year, and by serving these biscuits we eliminated the need to make a traditional sweet potato casserole.  Two sides in one!

My mom made the cinnamon honey butter.  It's perfect with the sweet potato biscuits, and it's even great just on toast!

Joe made the biscuits, I just came in partway through to take some (not very good) photos and eat raw biscuit dough (my favorite).  


Sweet Potato Biscuits
adapted from The America's Test Kitchen Family Baking Book
makes about 8 biscuits, depending on the size of your biscuit cutter

Notes: If you want to make these biscuits ahead of time, you can cut them out, lay them on a baking sheet, and refrigerate for up to two hours before baking (doesn't seem like a huge time saver, but if you or your guests demand biscuits hot out of the oven, this seems like a good way to go).  You can also freeze the cut biscuits on a tray in the freezer for about 6 hours, then pile them into a zip-lock bag where they will keep frozen for about a month.  When ready to bake, do not thaw, just bake them for a longer time, about 20-25 minutes.

1 large sweet potato (12 ounces), peeled and cut into ½-inch cubes
1½ cups heavy cream
¼ teaspoon vanilla extract
2½ cups (12 ½ ounces) all-purpose flour
2 tablespoons sugar
1 tablespoon baking powder
1 teaspoon salt
½ teaspoon baking soda
¼ teaspoon ground cinnamon
Pinch ground nutmeg

Move an oven rack to the upper-middle position and preheat the oven to 450 F.  Line a baking sheet with parchment paper.

Put the cubed sweet potato into a medium microwave-safe bowl.  Cover tightly with plastic wrap and poke a couple of small holes in it to vent.  Microwave on high for 5-7 minutes, or until the potato is tender.  Mash with a potato masher until very smooth.  Let cool slightly.

Whisk the heavy cream and vanilla into the mashed sweet potatoes until thoroughly combined.

In a large bowl, whisk together the flour, sugar, baking powder, salt, baking soda, cinnamon, and nutmeg.  Using a wooden spoon, stir the sweet potato mixture into this flour mixture for about 30 seconds, until it forms a dough.

Lightly flour a clean working surface and turn the dough out onto it.  Knead briefly, about 30 seconds, until smooth.  Pat the dough out into a ¾-inch thick round, about 8 inches in diameter.

Use a 2 ½ inch biscuit cutter if you have a perfectly equipped kitchen, or a small drinking glass of any size if you do not, and stamp out about 8 biscuits.  You may be able to make more if you are using a smaller cutter (we made 12 biscuits).  You may have to gently pat the dough scraps back together into a ¾ inch thick piece as needed to make all your biscuits.

Arrange the biscuits about 1 ½ inches apart, upside down, on the baking sheet.

Bake for 15-17 minutes, until lightly browned, rotating the pan halfway through.  Transfer biscuits to a wire rack and cool for about 5 minutes.  Serve warm.

Cinnamon Honey Butter
adapted from Ina Garten (Barefoot Contessa)
makes ¾ cup

¼ pound (1 stick) unsalted butter, softened
3 tablespoons honey
¼ teaspoon cinnamon
1/8 teaspoon kosher salt

Combine all ingredients in an electric mixer fitted with a paddle attachment.  That's it, you're done.

Serve at room temperature.  Store in the refrigerator.

Wednesday, November 24, 2010

Baked Sweet Potatoes with Leeks and Gorgonzola


Mmmm, I love sweet potatoes.  We usually bake them whole in the oven for an hour and then top with either sweet or savory toppings, but recently I came across a different way of cooking them that I wanted to try.  It’s from Smitten Kitchen, one of my favorite cooking blogs.


Deb (can I call her Deb?) sliced the potatoes into 1-inch thick medallions and roasted them with just a little oil, salt and pepper, flipping them partway through.  Then she served them with “a little Thanksgiving on top”: a salad of chopped celery, shallots, dried cranberries, goat cheese, and pecans…yum!  
I made my potatoes exactly as she described, but I topped mine with sautéed leeks and freshly crumbled Gorgonzola, and then put them under the broiler for a minute or two just to melt the cheese.  I got that ingredient combination idea from The Best Ever Three and Four Ingredient Cookbook.  


The result was a perfectly cooked potato, crispy on the outside, smooth and almost creamy on the inside.  The biggest bonus?  They were done in half the time it normally takes to bake a potato in the oven!  

Loaded with toppings - ready for the broiler.
They were so good!  I had extra potatoes and leeks so we made them again tonight!


Sweet Potatoes with Leeks and Blue Cheese
Adapted from Smitten Kitchen  
Serves 2 if the whole meal, 4 if a side

1 ½ pounds sweet potato (about 2 large)
3-4 tablespoons olive oil
Salt and freshly ground black pepper
1 large or two small leeks
½ cup (or more, to taste) crumbled Gorgonzola or blue cheese

Preheat the oven to 450 F.  Wash and scrub the potatoes.  Slice crosswise into ¾ to 1-inch-thick slices, don’t bother to peel.  Drizzle a couple tablespoons of the oil onto a baking sheet and spread it around so it coats the pan.  Lay the potato slices on the sheet in a single layer and sprinkle with salt and pepper.  Roast in the oven for about 20 minutes.

Meanwhile, prepare the leeks.  Slice off and discard the dark green tops and the very bottom end of the white part.  Take the part that remains and slice it lengthwise into quarters, then slice those quarters into small pieces.  Get a large bowl of cold water and fill it with the chopped leek.  Agitate it with your fingers to loosen any dirt, which will sink to the bottom.  Strain the leeks out of the bowl and dry them.  A salad spinner works great for this, or just lay them between two towels.  You want them to be as dry as possible so they don't spatter when you cook them.  

Add a tablespoon or so of oil to a skillet and turn the heat to medium.  When hot, add the leeks and saute until soft and a few start to brown.  Season with salt and pepper.  Set aside.  

When the potatoes have finished roasting on one side (they will be nice and brown/blistery on the bottom, some might be very brown), flip them over and season the other side.  Return the pan to the oven and let them cook for another 10 minutes or so, until the other side has browned as well.  

Remove the pan from the oven and turn on the broiler.  Top each potato slice with some of the leeks and cheese.  Broil for a couple of minutes, just until the cheese bubbles.  

Serve immediately.  

Saturday, November 20, 2010

Roasted Brussels Sprouts with Dijon Cream Sauce


Every year (ok, so that means the last three or four) it seems I only get around to cooking Brussels sprouts once, and I always make this recipe.  I think it's because they are just around for a short time, and I really love this meal, so I never want to try anything else!  

The recipe is from Cuisine at Home, and it's actually written up as a holiday side dish.  I've never made it for a holiday meal though, just a regular weeknight meal, usually with some kind of starch to go with it (tonight, we served it over polenta).  It's basically roasted Brussels sprouts, red onion, and sliced sausage, with a tangy dijon cream sauce drizzled over it.  Sometimes I even skip the sauce; it's good, but roasted veggies are always really good on their own too.  


You could use any type of sausage you want, just as long as it's already fully cooked.  This recipe calls for kielbasa.  This time, I used some delicious chicken apple sausage from Applegate Farms.  I love their deli meat and sausage.  


Roasted Brussels Sprouts with Dijon Cream Sauce
adapted from Cuisine at Home - December 2005
makes 6 cups

Note: This is how I prep Brussels sprouts: Wash and pat dry.  Remove outermost leaves if they are damaged or dirty. Slice off about 1/4 inch of the very bottom stem.  

1 pound Brussels sprouts, halved lengthwise
2 cups red onions, cut into wedges
8 ounces fully cooked sausage links (such as kielbasa, chicken and apple, etc), sliced 1/2 inch thick
2 tablespoons olive oil
Salt and freshly ground black pepper
1/2 cup heavy cream (I used half and half)
1/4 cup Dijon mustard
1 tablespoon honey
1 teaspoon apple cider vinegar

Preheat oven to 450 F.  

On a baking sheet, toss together the sprouts, red onion, sausage, oil, salt and pepper.  Spread out in a single layer and roast until the sprouts are tender but still crisp, about 20 minutes.  

Meanwhile, add the cream, mustard, honey, and vinegar to a saucepan and simmer over low heat for about 10 minutes, until slightly thickened.  

To serve, drizzle the sauce over the roasted sprouts.  Serve as a main course over creamy polenta or with a slice of crusty bread, or as a side dish, or just have it by itself!

Wednesday, November 17, 2010

(Leftover) Roast Beef Hash


Following up on my last post, this was my favorite leftover meal that we made.  What is your favorite way to use leftover roast beef?


Roast Beef Hash
serves 4

Note: Instead of roast beef, you can also use leftover corned beef.  You can also swap out 1 cup of the boiled potatoes with peeled cooked beets to make what's called Red Flannel Hash.  

3 tablespoons oil or butter
2 cups chopped leftover roast beef (small cubes)
2 cups chopped cold boiled potatoes (small cubes)
1 cup chopped onion (I like it finely chopped in this dish)
1/2 cup liquid, such as stock, tomato sauce, milk, cream, or gravy
Salt and freshly ground black pepper, to taste

In a large bowl, toss together the beef, potatoes, and onion.  Add about 1/2 cup of the liquid, just enough to moisten the mixture but not so much that it becomes soupy.  Season with a little salt and pepper.  

Put the oil or butter into a large oven-proof, preferably nonstick, skillet and turn the heat to medium-low.  When hot, add the hash, pressing it out into a nice flat layer with a spatula.  Cook, undisturbed, for about 10 minutes.  Preheat the broiler.

At this point, Bittman suggests you can flip the hash over and brown the other side.  Mine did not seem that sturdy, so I opted for his other suggestion of browning the top under the broiler.

Serve with a fried egg on top, if desired.    

Monday, November 15, 2010

Beef Sirloin Tip Roast with Roasted Vegetables


A couple of months ago we purchased quarter of beef from Bald Hill Farms.  We now have a whole chest freezer full of delicious grass-fed, free-range cuts of meat.  To buy high-quality meat like this in small quantities is not very cost-effective, so we decided to take the plunge and buy in bulk, saving money in the long run.  I still don't want to eat meat everyday, but I like supporting a local company and I like how they raise their animals.  They've dedicated part of their land to public hiking trails, so I can actually go on a hike and walk right by their pastures (and I have)!  Talk about knowing where your meat comes from!    

This was the first of the roasts we made, using a recipe from the weekly ad at our new Market of Choice.  Note to self: take the meat out of the freezer much sooner than you will need it to give it plenty of time to thaw!  I'm not sure it was as tender as it should have been, because it was still a bit frozen in the middle.  We kept the internal thermometer in so we could be sure it reached a safe temperature, but I'm afraid the outer parts cooked a bit longer than desired.  Still, the flavorings complimented the meat very nicely and we were very happy with it in the end.  We also roasted a large pan of local root veggies which were delicious.

We cooked a 5 pound roast instead of 3 pounds like it called for.  That gave us lots of leftovers to use in various ways throughout the week.  We had roast beef sandwiches, steak quesadillas, and my favorite, steak hash with a fried egg on top!  None of it went to waste.  I also had lots of leftover roasted veggies, along with some extras that wouldn't even fit on the pan, so about a week later (I didn't really want to wait a whole week, but I was too busy) I made a yummy pureed mixed vegetable soup.  I cooked the raw veggies first, then added the roasted veggies near the end.  


Beef Sirloin Tip Roast with Roasted Vegetables
adapted from Market of Choice
serves 6-8

Notes: The recipe calls for Sierra Nevada Autumn Ale, which I used and is delicious, however it's seasonal and might not be available in stores anymore.  But any good brown or amber ale will do.  

For the roast:
3 pound sirloin tip roast
3 tablespoons olive oil
2 tablespoons kosher salt
1 teaspoon ground black pepper
1 teaspoon smoked (Spanish) paprika
1 teaspoon onion powder
1 teaspoon garlic powder
1 teaspoon dried oregano
pinch cayenne
1 yellow onion, roughly chopped
8 whole garlic cloves, crushed
1 tablespoon whole black or tri-color peppercorns
2 bay leaves
1-12 ounce brown or amber ale (see note above)

Preheat oven to 350 F.  Heat the oil in a Dutch oven (or other type of roasting pot) over medium-high heat.  Combine the kosher salt, ground black pepper, paprika, onion powder, garlic powder, dried oregano, and cayenne, and sprinkle generously all over the roast.  Brown the roast on all sides in the pot.  Add the onion, garlic, peppercorns, bay leaves, and the beer.  Bring to a simmer.  Transfer the pot to the oven and roast, uncovered, for about 1 hour, or until the internal temperature reaches 135 F (for medium rare).  Remove roast from oven and from pot, and let rest for 10 minutes before slicing.  Serve with pan juices and roasted vegetables.  

For the roasted vegetables:
Use a mix of your favorite root or hard fall vegetables, such as pumpkin, squash, rutabaga, turnips, carrots, potatoes, and parsnips.  The amounts and types listed below are a suggestion; just deviate from it depending on what you like or what you have.    

2 pounds pumpkin or winter squash, peeled, seeded, and diced into 1-inch pieces
1 medium rutabaga, peeled and diced into 1-inch pieces
2 medium turnips, peeled and diced into 1-inch pieces
1 pound medium red potatoes, quartered
2 medium carrots, peeled and chopped into 1/2-inch pieces
12 whole garlic cloves, peeled
1 yellow onion, chopped
1/4 cup olive oil (it actually calls for pumpkin seed oil, which might be good, but I didn't want to buy a special oil just for this)
Salt and pepper to taste

Toss all ingredients together on a baking sheet.  Roast in the oven at the same time as the meat for 40-50 minutes until softened and caramelized.  Serve immediately.  

Monday, November 8, 2010

Adventures In Canning, Part Two


I did it!  I made my own apple butter!  It wasn't difficult, and the result tastes really good!  My main reason for making it was to be able to share it with my dad, who LOVES the stuff.  He's getting like half the batch - which should last him a couple months :-)  

I was going to attempt to re-write the recipe I used, and give detailed instructions on canning, but I'm afraid I will miss some details or not explain them well, and it's really not the kind of thing you should cook by just reading a one page recipe anyway.  I think if you are going to can something like this you should have a book to refer to in case you have a question or something doesn't seem to be going just as planned.  You need to follow the directions to the letter to be sure that your product is safe.  I borrowed my friend Amy's canning supplies and the book she uses.  I really liked the book, it's called "The Busy Person's Guide to Preserving Food" by Janet Chadwick.  It tells you everything you need to know about canning, freezing, and drying food.  I'm going to get my own copy, along with my own canning supplies, because this was fun.  I also like this website.  It has a ton of info on canning, along with stuff about local produce in general.  

So instead of typing the recipe exactly, here are some pictures and brief explanations of what I did.  In case you noticed, you're right, this is not my kitchen.  I ended up house-sitting for a friend on short notice, so I made the apple butter in her kitchen.

First, I went to the Farmer's Market and bought about 12 pounds of apples (I was making a double batch).  I was looking for tart apples, such as Liberty, Golden Delicious, McIntosh, and Jonathan.  I bought a few pounds from about four different farms so I had a good variety.

About half of the apples I bought.
I loved this recipe because I didn't have to peel or core a single apple!  I just chopped the apples into small pieces, including the peels and cores, and put them into a pot with 2 cups of apple cider (which I bought from one of the apple farms).  I brought it to a boil and let the apples cook for about 20 minutes.


They cooked down considerably.


I then ran the cooked apples through a food mill in batches.  My awesome mother-in-law was kind enough to mail me her food mill so I wouldn't have to buy one (needless to say, when I return it to her, she's getting a jar of apple butter to go with it!).  The food mill helps to separate out the peels and seeds, so you are left with, basically, apple sauce.  I blended it a little more with an immersion blender to get it a little smoother.  


I spread the mixture out into a shallow baking dish and put it in a 200 F oven and let it cook for 8 hours, stirring every hour or so.  Then I added a little ground cinnamon and cloves (no sugar at all!). 


About an hour before I was ready to fill the jars, I filled the waterbath canner and turned the heat up to bring it to a boil (it took a LONG time).  I got the lids gently simmering in a pot of water, and I had another pot of water barely boiling in case I needed to add more to the waterbath at any point.  I cleaned the jars in the dishwasher so they would be clean and hot when I was ready.


I filled the jars, wiped the rims with a clean damp cloth, and put on the lid and screw band.  Then I loaded the jars into the rack in the water bath and lowered them to the bottom.  I had to wait awhile for the water to come back to a boil, but then I just had to boil them for 5 minutes and then I took them out and let them cool for 24 hours on the counter.

Jars loaded, ready to be lowered.
Jars lowered, waiting for water to return to a boil.
I know the lids are sealed because the center is depressed (no popping when pressed), and I can pick up the lid by the edge and it stays sealed.    

The jars had a fine white powder on the outside, I think it was residue from the metal rack.  It wiped right off.  
Related Posts Plugin for WordPress, Blogger...