Showing posts with label Sandwiches/Burgers. Show all posts

Monday, December 12, 2011

A Really. Good. Sandwich.


This past fall I made apple butter using the recipe from Canning for a New Generation. The author was kind enough to include a side note with many thoughtful suggestions on how to use it, besides the obvious method of just spreading it onto a biscuit or toast. Apple butter can be used instead of apple sauce in baking, it can be added to oatmeal, and yes, it can be used on sandwiches.

This sandwich may be simple but it's big on flavor. Ingredients: Good rye bread. Black forest ham. Sharp cheddar cheese. A generous slathering of apple butter. Done. You could grill it if you wish, but we just ate it cold. I loved how the savory flavors in the rye bread mingled with the sweet apple butter. It was amazing.

Try it.

Thursday, July 28, 2011

Grilled Cheese with Gruyere, Radicchio, Roasted Garlic, and Dijon on Sourdough


We were out of town a lot last week, so it's taking us a little longer to get through all this produce. A couple of our best friends got married and Joe and I were so honored that we were both asked to be in their wedding. It was such a fun weekend!


Getting back to the food, we got some radicchio in the box this week, and it was different than the small, tight spheres I am used to seeing. This kind had larger leaves and was more open, like a head of Romaine lettuce, which made me think of using it in a sandwich. I decided to make a simple but fancy sounding grilled cheese. Mark Bittman has a ton of sandwich combination ideas in How to Cook Everything Vegetarian so I modeled my sandwich off of those. Since I had to roast garlic in the oven for the sandwich anyway, I added the summer squash we got in the box to the baking sheet as well, to go on the side.

CSA Week 8:


In the box: 1 Radicchio, 1/2 pound spinach, 1 sweet onion, 1 pound tomatoes, 1 pound summer squash, 3 pounds French fingerling potatoes, 1 basket raspberries, 1 basket cherries.

Before we left town, we made a delicious pasta dish from the Wednesday Chef - Pamela Sherrid's Summer Pasta, which used all the tomatoes. Part of the recipe has you slice garlic and let it sit in a bowl of olive oil on the counter all day, which will make your whole house smell absolutely wonderful when you get home (seriously, try it!). We boiled the spinach to have on the side, since we already had water boiling for the pasta, and just drizzled it with some olive oil for flavor.

The raspberries and cherries made a perfect snack in the car on the drive up to Portland.

Now...what to do with three pounds of potatoes?!  Two pounds of them were sliced into wedges and roasted in the oven to go with burgers, which were topped with grilled sweet onion. The other pound of potatoes is still in the fridge waiting to be used.


Grilled cheese with Gruyere, radicchio, Dijon, and roasted garlic on Sourdough 
adapted from Mark Bittman - How to Cook Everything Vegetarian

Garlic cloves, unpeeled (we used about 6 cloves for two sandwiches)
1 head radicchio
Sliced sourdough bread
Sliced Gruyere
Dijon mustard

Preheat the oven to 375 F.  Put the garlic cloves on a baking sheet, drizzle with olive oil and a sprinkling of salt. Bake, stirring occasionally, for about 20 minutes. They are done when you can poke them with a fork and they seem mushy inside. Remove to a plate.

While the cloves are cooling, slice the radicchio. You could slice it into big hunks or thin slivers, however you want. (Personally, I think next time I will do slivers so that the whole piece of lettuce doesn't slice out of the sandwich in a single bite). Lay them on the same baking sheet you used for the garlic and drizzle with olive oil and sprinkle with salt. Broil until the leaves are wilted and starting to crisp on the edges. Remove from oven, set aside.

Once the garlic cloves are cool enough to handle, slice them open and squeeze out the delicious roasted garlic. Set aside.

Toast the slices of sourdough. Melt some gruyere onto one slice using the broiler. To the other slice, spread some Dijon and some of the roasted garlic. Top with a few slices of radicchio. Serve immediately.


Wednesday, March 9, 2011

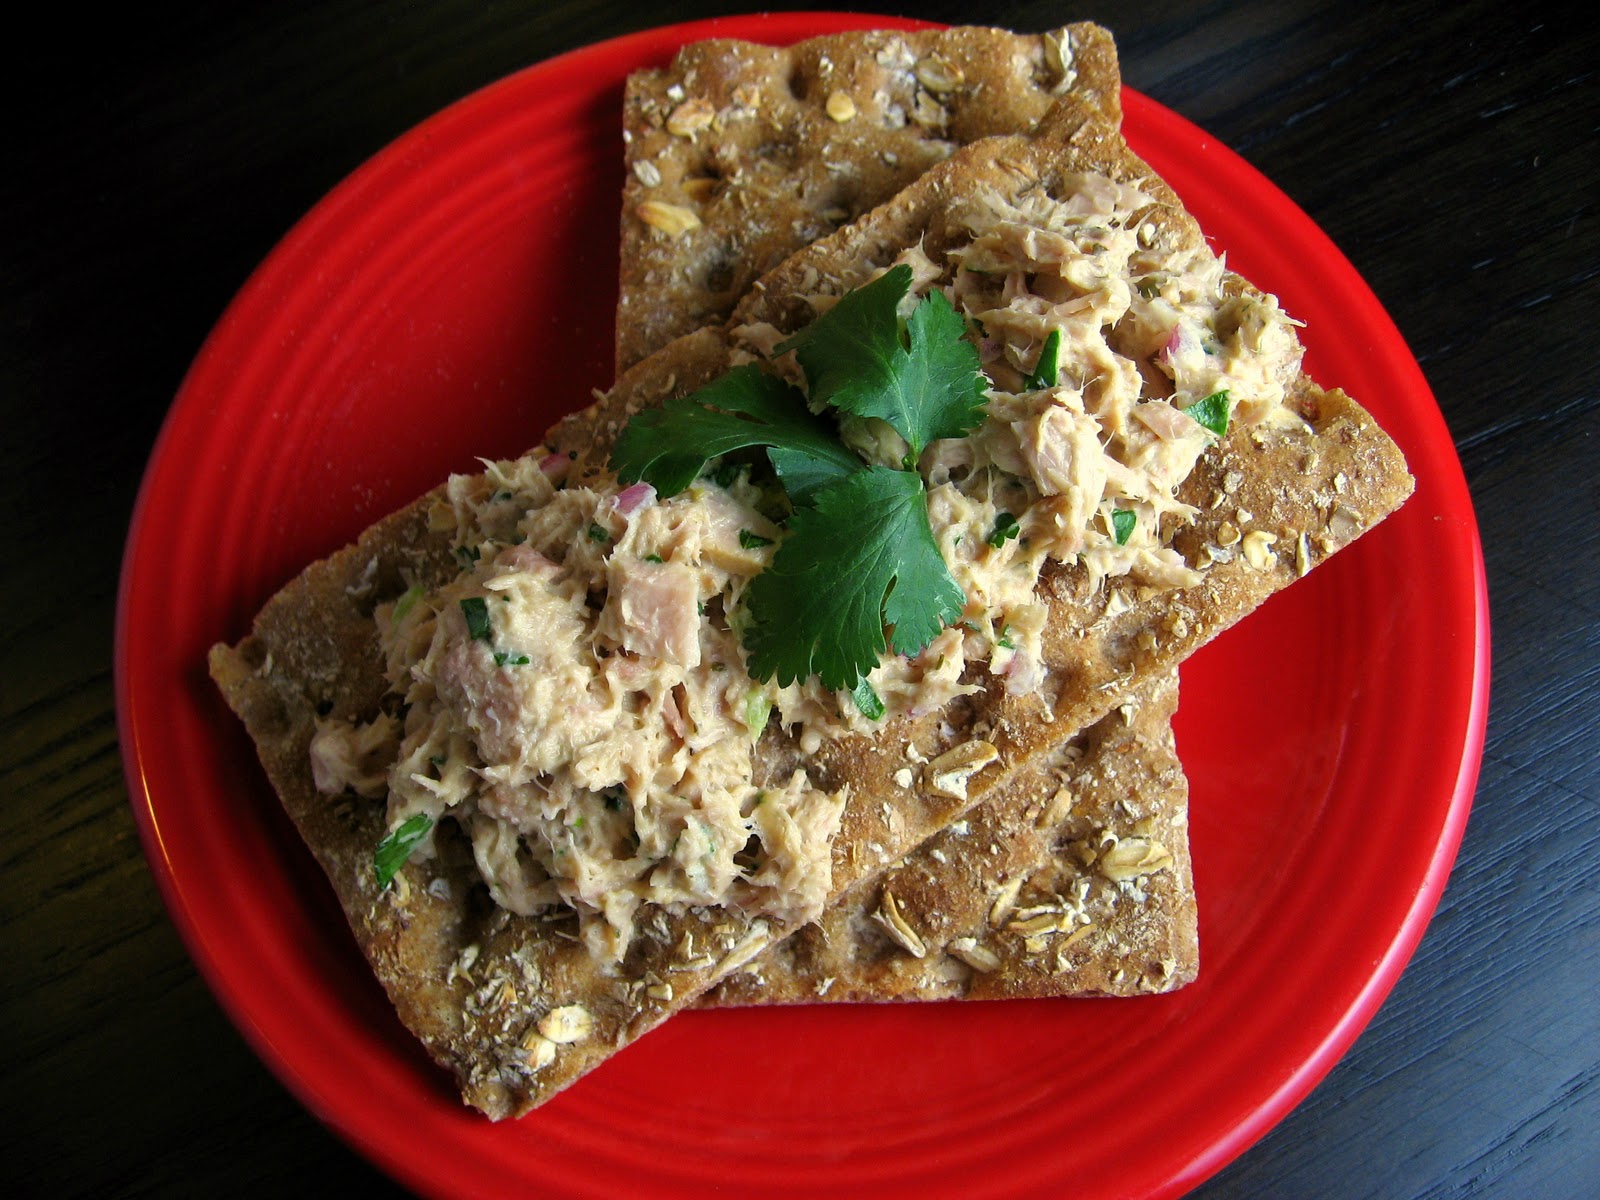
Yumm! Tuna Salad


Ah, my new favorite pastime: finding ways to incorporate Yumm! Sauce into everything I eat. This time, I used it instead of mayo in tuna salad. It was delicious, and made a great lunch to take to work!

I'm not a big fan of mayo. I only use it sparingly in recipes if I absolutely have to. I have never been one to spread it on sandwiches or burgers; it's one of those "picky eater" habits I still cling to as an adult. 

I am pretty sure I've always disliked the stuff, but I can say for sure that one experience I had as a kid sealed the deal. My sister and I were in elementary school at the time, and my mom was working there as a staff assistant. Some days after school we had to wait around for her while she was still working, so we'd hang out in the staff break room. One day, we were sent to wait there as usual, and saw a huge spread of food set out that was leftover from a lunch potluck earlier that day. My mom said we could help ourselves. So I grabbed a roll, spread on a large amount of butter - what I thought was butter - and took a bite. 

I could tell something was up with that butter. It did not taste right. I had to take a few bites to figure it out, but we finally realized what had happened: the mayo had turned yellow from sitting out all day, so it looked like butter. ::gags::

And that's why I don't like mayonnaise. That's also why you should never let perishable food sit out for more than two hours.

Remind me to tell you about the time my best friend got me to try tarter sauce - and how she conveniently "forgot" to tell me until afterwards that it's basically composed of mayo and pickles! Ok, that's pretty much the whole story right there. She's still my best friend, but I do not eat tarter sauce...

Anyway, now that I've (hopefully!) ruined your taste for mayonnaise, here is my recipe for Tuna Salad - sans Mayo!


Yumm! Tuna Salad
inspired by Cafe Yumm
makes about 6 servings

2-(6 ounce) cans tuna, packed in water
1/2 cup Yumm! sauce, original flavor
1-2 tablespoons minced red onion
1 tablespoon minced celery (optional)
1-2 tablespoons minced cilantro
1/2 tablespoon lime juice
Salt and freshly ground black pepper to taste

Drain tuna. Put tuna into a medium bowl, flaking it apart with a fork. Add remaining ingredients, stir to combine. 

Taste and adjust the flavor as needed by adding more of any of the ingredients as you see fit. I'm pretty sure I added more Yumm! sauce because I wanted a creamier tuna salad.

This will last for a several days in the fridge. It makes a great lunch as a sandwich or as a spread on crackers or crispbread. 

Wednesday, November 3, 2010

Welsh Rarebit burgers


Gotta love Rachael Ray.  These are huge, insanely messy burgers.  I mean, they're covered in a cheese sauce for crying out loud!  And they're delicious, of course.  I love the unusual ingredients, like Pumpernickel and watercress.  Welsh Rarebit (or Welsh Rabbit) is a British dish that is basically a cheesy sauce served over toast.  

Whenever I cook Rachael Ray recipes, I keep an eye out for opportunities where I can tweak amounts of ingredients or portion sizes so that the meal is a little more reasonable for me.

Case in point: For the cheese sauce, she wants you to use a pound of cheese.  To me, that just seemed excessive.  I probably used about 1/2 to 2/3 of the cheese and I thought it still tasted great.  Even with less cheese, it made so much that we got to use the leftovers as fondue the next night, dipping in chunks of leftover pumpernickel bread and chopped apples.  You could also just make half the cheese sauce recipe, but who doesn't love an excuse to have fondue?


Another part I adjusted was the size of the burgers, but that was only necessary because of the bread we bought.  At our store the choices were either gluten-free pumpernickel or regular rye.  We went with the rye, but it was a rather squatty loaf, so I cut the hamburger patties in half to make them fit.  If you can only find short bread like us, you can figure out some way to make it work for you.   Joe used a whole hamburger patty, but cut it in half and served it open-face on two slices of bread, piling the toppings on the side like a salad.  I just had half a patty between two slices of bread.  It's still really filling considering you have a cheese sauce and bacon on it too (the one pictured above is only half a patty, by the way).  But you could also make two full sandwiches and just place half a patty on each, whatever works for you and your appetite.

Welsh Rarebit Burgers
adapted from Everyday with Rachael Ray - August 2008
serves 4 (more than 4 for us, since we aren't big eaters.  Just don't assemble the burgers you aren't going to eat and heat them up the next day in the mircowave.  Use the extra cheese sauce for fondue, if you like, with chunks of extra pumpernickel bread for dipping)

8 slices bacon
1 1/2 pounds lean ground beef
1 shallot, finely chopped
1/3 cup finely chopped parsley
salt and pepper
Extra-virgin olive oil, for drizzling
2 tablespoons butter
2 tablespoons flour
2 tablespoons Worcestershire sauce
1 tablespoon dry or prepared mustard
1 teaspoon hot sauce (I used half a teaspoon because I didn't want it to be spicy)
3/4 to 1 cup stout, such as Guinness
1 pound shredded cheddar cheese (we used sharp, and about 1/2 to 2/3 that amount)
8 slices pumpernickel bread
1 small bunch watercress, chopped
4 thick slices beefsteak tomato (or just some slices of whatever tomatoes you have)
Salt and Vinegar potato chips, for serving (I think these are gross, so I bought other chips for me)

Preheat oven to 350 F.  

She wants you to cook the bacon on a broiler pan until crisp, about 15 minutes.  We don't own a broiler pan, so we just cooked them on a regular pan the oven (not as healthy of course).  Basically, just cook the bacon however you like it.  

Preheat the broiler.

In a bowl, gently combine the beef, shallots and parsley.  Season with salt and pepper.  Form into four patties.  Dent the center with your thumb so they don't puff up while cooking.   

Heat a drizzle of olive oil in a nonstick skillet over high heat (if using fattier meat, like 15-20%, omit the oil entirely).  Cook the patties until they are as done as you like them (She suggested three minutes on each side for medium rare.  We like them more well done then that so we cooked them longer).

In a large saucepan, add the butter and melt over medium heat.  Whisk in the flour, cook until light brown, about 3 minutes.  Stir in the Worcestershire, mustard, and hot sauce.  Whisk in the stout, cook for a couple of minutes until thickened.   Lower the heat a bit, and add the cheese in handfuls, stirring until smooth.  

Lay the slices of pumpernickel on a baking sheet and toast in the oven on both sides.  Pour a little cheese sauce onto each toast, broil a couple of minutes until the cheese bubbles.

Assemble the burgers: Place the four patties onto four cheesy slices.  Pile some watercress on top, followed by the bacon and the tomato.  Top each with another slice of bread, cheesy side down.  Serve with potato chips and lots of napkins.  

Thursday, May 13, 2010

Hummus, Tempeh, and Cucumber Wrap


Earlier this week, we made these delicious wraps based on a recipe from Skinny Bitch in the Kitch.  

The wraps are filled with tempeh, which is a great meat substitute.  One serving provides almost half of your protein for the day, plus a slew of other vitamins and minerals.  We often eat it on sandwiches instead of deli meat, or we chop it up and add it to enchiladas or salads.  It's cheap, and it freezes well, which is always nice.  In this recipe, you add flavor to the tempeh by cooking it in coconut oil with some ground coriander, garlic powder, and soy sauce.  I thought it was a really great seasoning combination!    

By the way, I'm always looking for new ways to use tempeh, so if you have a favorite recipe, please let me know!

To these wraps I added my first crop of veggies from my spring garden!  I've tried to grow both radishes and spinach in the past, but was unsuccessful.  This year though, my garden seems to be doing very well!


The recipes only calls for romaine and cucumber for veggies, but you could add others, such as other salad greens, carrots, bell peppers, red onion, tomatoes, etc.  There is hummus in the wrap, so just think of veggies you would otherwise dip in hummus and you should be good.  Also, it calls for whatever kind of bottled vinaigrette dressing you like, so we chose the only dressing we ever keep in our house: Yumm sauce, of course!  

If you don't want to use a tortilla, you can also serve this as a salad, like we did for lunch the next day:  


Hummus, Tempeh, and Cucumber Wrap
adapted from Skinny Bitch in the Kitch
serves 4

1 tablespoon refined coconut oil (or you could use vegetable oil)
1/2 teaspoon garlic powder
1/4 teaspoon ground coriander (I probably used more like 1/2 teaspoon)
2 tablepsoons tamari or soy sauce
1 (8 ounce) package tempeh, cut lengthwise into 1/4-inch strips
4 tortillas, whatever size you want, white flour or whole wheat flour
1 cup hummus
1 cucumber, peeled and cut diagonally into thin slices
1 romaine heart, cut into thin strips, or torn into bite size pieces
1/4 cup bottled vinaigrette dressing, whatever kind you like, or Yumm sauce

In a large skillet, heat the oil over medium heat.  When hot, stir in the garlic powder, coriander, and soy sauce.  Add the slices of tempeh and cook for a few minutes on each side, until nicely browned.  Remove from heat.

They give very specific directions for assembling the wraps, see below, but just do it however you want.  I usually use such a small tortilla that it doesn't wrap very well anyway, so I just fork and knife it.    

To assemble the wraps, spread 1/4 cup of the hummus on each tortilla.  Divide the tempeh strips among the four tortillas and lay them in a column down the middle, leaving a 2-inch border on one edge.  Top each with some cucumber, romaine, and whatever other vegetables you're using.  Drizzle the dressing over each pile.  Fold one side of the tortilla up over the filling, fold in the edge with the border, and continue to roll the tortilla to the other side, making a tight bundle.  Serve seam side down on a plate.  Repeat with the remaining tortillas.  
Related Posts Plugin for WordPress, Blogger...